Translate

Tuesday, February 1, 2022

New Scenario Books

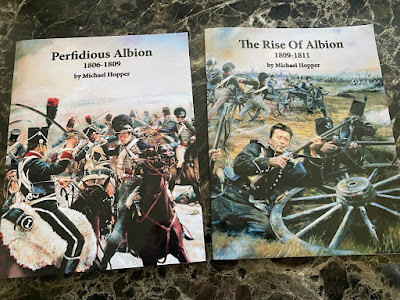
Today's post will focus on the two new scenario books from the prolific scenario book writer, Michael Hopper. I have reviewed previous scenario books he has put together and now we have two for the interim years after Austerlitz and the 1812 Russian Campaign. These two books are centered mostly around the British aggression all over the globe during this period.

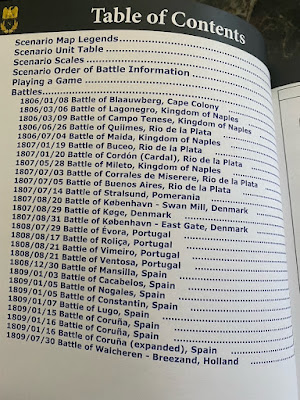
Perfidious Albion deals with the most global scenarios. If you've gotten a little tired of your British only fighting in the Iberian Peninsula, then this book is for you. You will be required to find some substitute units unless you have Danish, Kingdom of the Two Sicilies and odd Spanish militia suitable for South America. As seen above, there is quite a span of localities to choose from and arranged in chronological order.

One of the nice features of Michael Hopper's work is this quick reference chart for the number of units needed for a scenario. For those who have limited numbers of figures available, you can easily narrow down or plan for what is needed for any particular scenario.

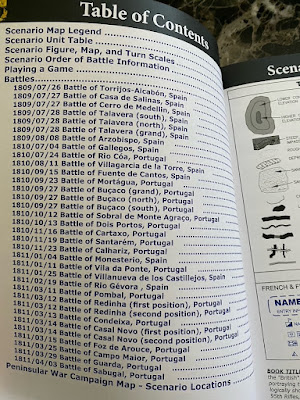
The Rise of Albion offers you the opportunity to fight sequential battles during some of the formative years of the British army's ascendancy. If you are considering a campaign among a group of dedicated gamers in your group, refighting the historical battles in order can be done. You don't need to spend lots of time digging through Oman's exhaustive volumes looking for maps and orders of battle. Some of these scenarios are just between Spain and France.

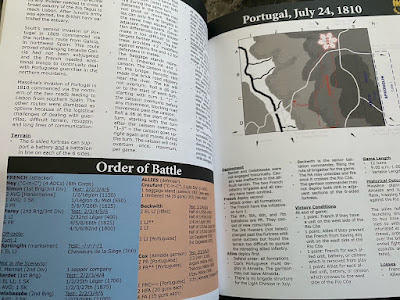
The scenarios are written with the wargamer in mind. With an order of battle that can easily be translated into almost any rule set of your choice, the books offer a lot of value. Time scales are provided for the number of turn and the time the battles lasted. Depending on your rule set, that may not require any adjusting. The research part of these battles has been done and is easily laid out where you can setup and finish a scenario with a clear understanding of what victory conditions are for each side.

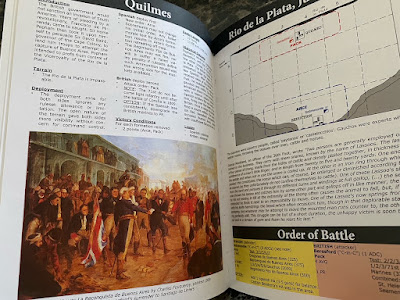
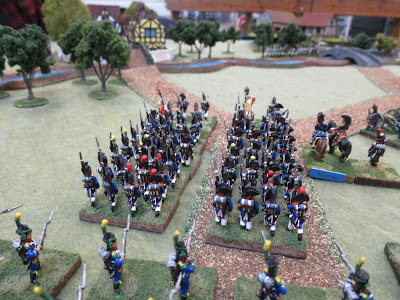
The size of the battles vary. Just as the size varies, the topography also offers variety to make interesting games or to suit what you have available. So if you're a beginner or a long time collector, you will find opportunities for your collection.

The back of the scenario books are just as beautiful as the cover. If you have any of Michael Hopper's previous scenario books, you will be familiar with the detailed explanations and layout of the books. 

If you're interested in adding either or both of these books to your collection, contact Michael Hopper directly and find what the shipping and exact charges are for your country. log1cal.mh@gmail.com


Wednesday, January 26, 2022

AAR: Battle of Gunzburg, October 9, 1805

Mack Disregarded his officers' recommendations to retreat to Vienna and opted instead for an active defense in and around Ulm. Mack Ordered d'Aspre's force to defend the Gunzburg bridges. Meanwhile, Ney was ordered to take all the bridges between Gunzburg and Ulm in order to link up with Lannes and Murat who were already on the south bank of the Danube. Ney quickly moved Malher's 3rd Division towards Gunzburg with orders to take the bridges.

 Austro-Hungarian center around Gunsburg. Ruffer's command is defending the crucial center bridge.

 
Austro-Hungarian units on the right around Reisenburg. De Melgum's command is around here. 
 
 
The Austro-Hungarian left around the village of Leipheim. Reinhardt's forces on this flank protecting this bridge.
  
The French under General Mahler's ten battalions all enter onto the field from the main road and fan out to the flanks. Going against the town of Reisenburg has been assigned to a battalion of converged elite companies under General Lefol.   
 
Up to the center. The artillery on both sides are hampered by forested areas all long the river. This works against the interest of both sides as it prevents softening up defenses or offensives. It is all going to come down to the bayonet. 
 
General Lebasse's two battalions of the 59th Ligne can be seen going for the bridge at Reinhardt. The yellow 4-sided dice are representing damage done the the bridge by the defenders. Before the French can make it all the way across, the French sapeurs have to successfully make a repair. Michael Hopper's scenario doesn't call for multiple damage points and doesn't permit destruction of the bridges. So we decided to try potential multiple damage points to see how it would play out. 
 
The French here are also attempting to get onto the bridge to conduct a repair with the sapeur as seen in the bottom right of the picture. 
 
After clearing some of the damage, one of the early assaults pushed this leger battalion back across. This will repeat until turn 12. Assault after assault here just could never break into the town of Gunzburg.

No, the defenders didn't all break and run... well yeah, actually they did. I forgot this flank as I didn't think this lone elite battalion could do anything more than tie down units here. As it turned out, the Austro-Hungarians came across the bridge and prepared to attack. The French didn't wait for them to position themselves and attacked and broke two infantry battalions and repulsed the Austrian kuirrasier unit without the need for square. Because this command was effectively demoralized, it broke. All that and I didn't have a chance to picture the only successful part of the field. One bridge is captured.

And this image is effectively all that happens on this flank for the entire game. The Austro-Hungarians here only got their flank shot by the French guns before they high tailed it behind the trees (you can sort of make them out). The enemy infantry kept lively fire upon the French as they attempted repairs just as fast as the enemy could inflict them.

 
To add some pressure to the center and take advantage of a non-existent Austro-Hungarian right flank, the converged elites storm the hill and move to the center as if in preparation for Austerlitz a couple of months later. The Austro-Hungarian command now has to shuffle around some resources to stop this.


Austrian artillery is brought up to support this line battalion opposing this French advance. In ordinary circumstances, the line battalion would not do anything more than act as a speed bump.


With the damage temporarily repaired, an assault into the edge of Gunzburg commences. Will the hard work of the sapeurs and leger finally pay off?

This battalion of the 59th ligne had to back off the bridge voluntarily. Too much hot lead was inflicting disruptions that were risking the unit being broken. The enemy sappers are able to keep damaging the bridge. Maybe the idea for accumulated damage for bridges wasn't necessary.

 
The damage has been cleared and another assault on the town's edge is conduct. The enemy unit protecting the flank of the town is now free to down toward the river. Lefol's converged elite battalion has backed off once combined arms of infantry, cavalry and artillery are brought up. Only the Austro-Hungarians have any cavalry and if for nothing else, will cause some French hesitancy for turning the entire flank and hitting the center.

 
The French guns are silent with nothing to target. The infantry and sapeur labor in vain as can never get far enough across to assault the Austro-Hungarian troops. 

For a minor victory, the French only need to secure one bridge and that minimal objective was achieved. Historically, the above flank that was turned, not the other end. In conclusion, I don't believe the scenario written by Michael Hopper in Rise of Eagles is in anyway wrong, just the rules in Lasalle don't lend themself to assaults in columns for assault across a bridge. The forested areas also prevent line of sight and so the artillery has no real effect. We still enjoyed the game and more unique situation of the scenario.

Sometimes, repeating historical results are more difficult than it might appear.