Trying a different direction in gaming, here is a 6mm Albuera my group played in recently. The French left flank here near Soult's position. We used historical OOB's but deployment was a little different. The varying weather as in the historical battle's rain played a role in this.
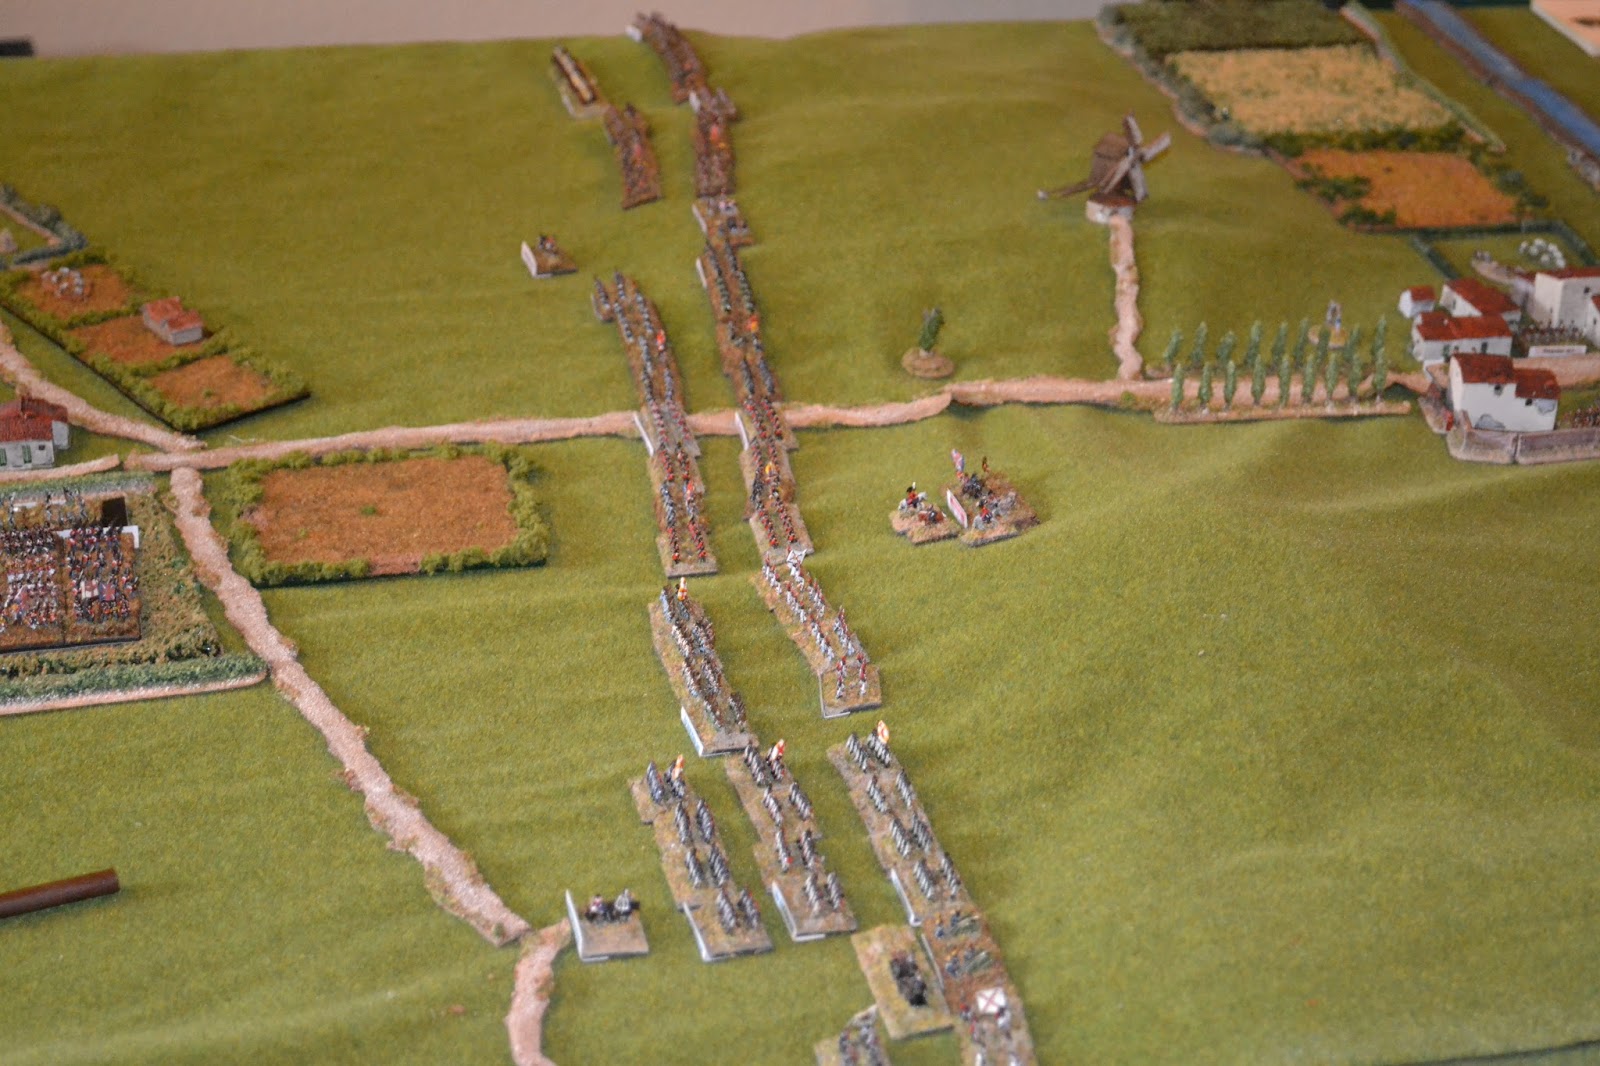
The opposing Spanish right flank. Knowing the Allies have little artillery, we decided to set up the Spanish and British behind the ridge instead on top of it. This would shield us from French fire until they were up close. Latour-Maubourg's cavalry can be seen trying to get around the Spanish line.
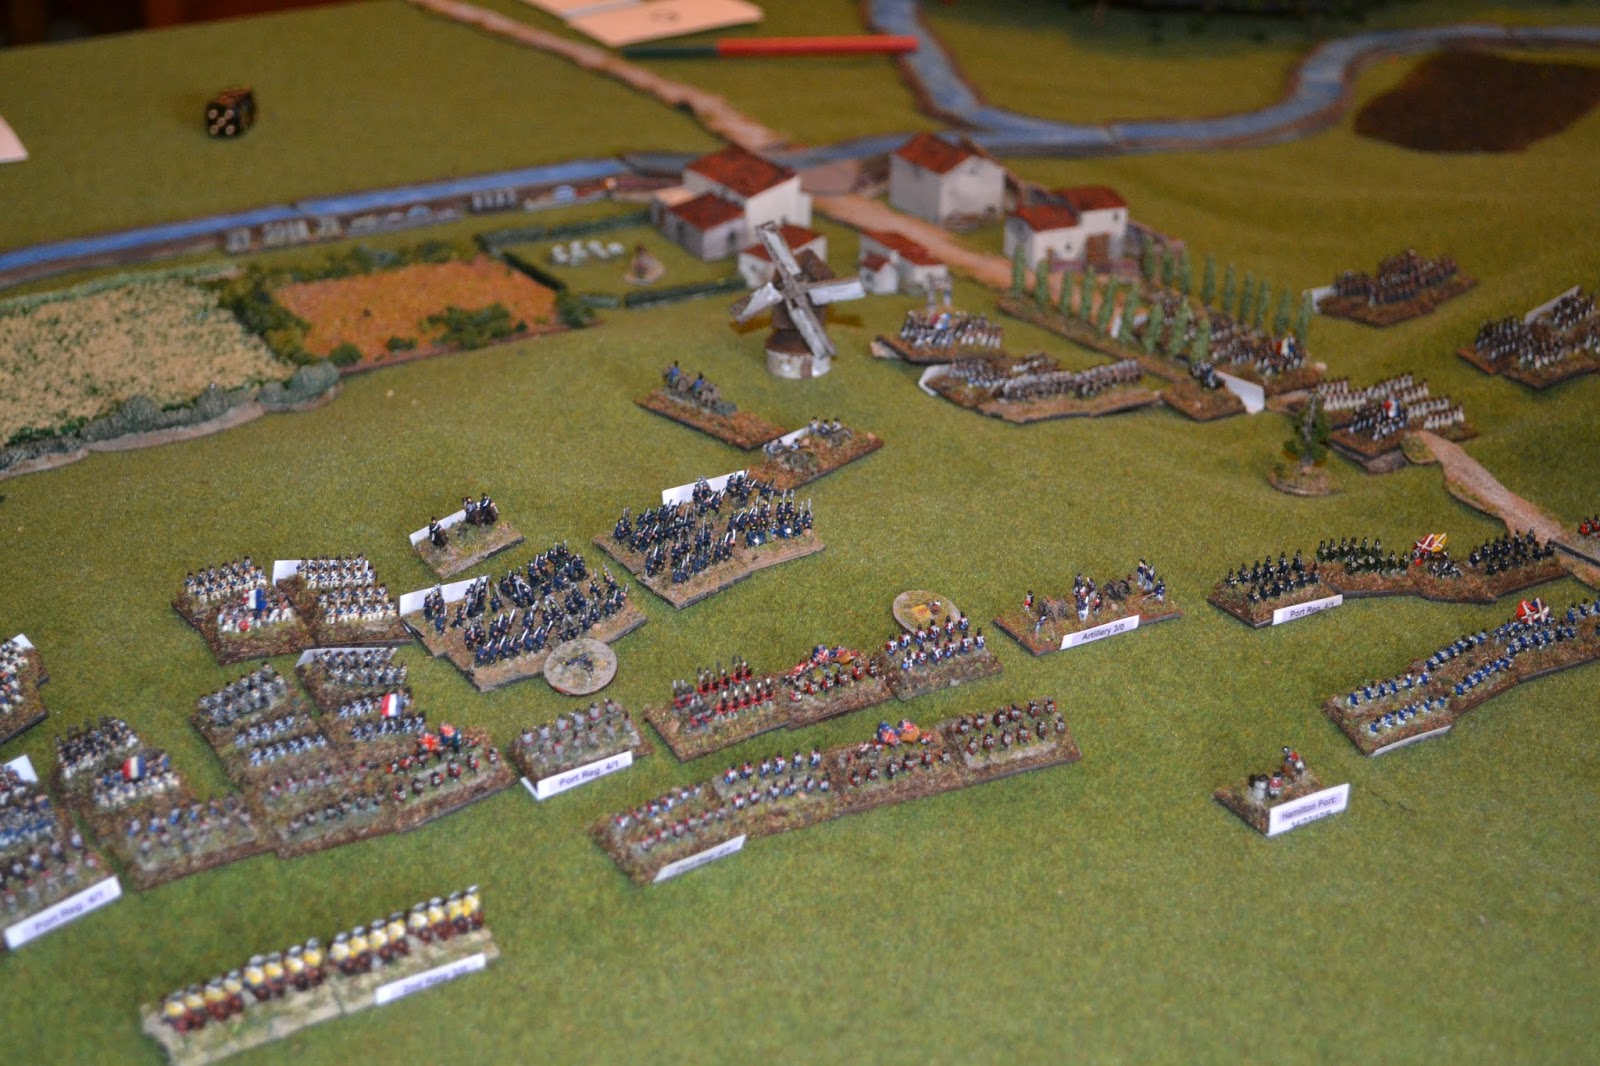
The village of Albuera on the opposite side of the battlefield. The river is fordable in a few areas and will slow down some of the progress made here by the French. We didn't understand until near the end of the battle that the village had some victory point value and was worth holding.
A better view of the Allied position behind the ridge. To the left, reserves being positioned more towards the Spanish as they are the weakest link and will likely need the help later on.
The extreme Allied right where the Spanish cavalry are positioned for a counter strike. One battalion in a square to increase its odds of surviving. As it later turns out, would be needed.
The French cavalry positioning for their strike. Why the artillery is not deployed to open up on the square is unknown but I did not correct my opponent. The only thing I can assume is he was overly confident of smashing the Spanish and did not feel like wasting time with such time consuming measures. Keep that in mind for later.
My apologies for the blurry picture here, but 6mm picture taking is new for me. The French right closing in on the village while the defenders spread out into line. The French as it turned out got across the river quite easily. We had varying weather during the game like the real battle but the rains didn't seem to keep the French back.
The Allied center with the Spanish command ending and the Portuguese brigade starting up. Not much goes on here until the last several turns of the battle.
More French reinforcements fording the river near the village. As the Allies, we decided not to hold the village as we didn't think it necessary nor did we think we had the numbers to hold it and the rest of the line. The French have a reserve that came in later during the game and not knowing where it was coming in made it difficult to commit the bulk of our men, especially when worrying about how long the Spanish could hold out.
I believe this is Cole's brigade being held in reserve along the Allied left. Stewart, the other reserve brigade, was in position behind the Spanish as an immediate reinforcement.
I forgot a picture or two from this Allied right flank, but this is the end result of a Spanish initiated cavalry charge. The blurry cavalry on the bottom right had charged, pushed back the French cavalry now coming back at them. During that interval, the French horse artillery battery was destroyed. The French are seeking some revenge and are now fully engaged.
The French infantry finally engage the Spanish along the curved line of the Allied right. A Spanish battalion is broken and the French keep on coming, seemingly again not deeming the Spanish worthy of weakening before rushing right in. The rain inflicting negatives or the impossibility of musketry at times probably also adding to the decision.
Stewart's brigade lined up in assuming a new flank when the Spanish give way. Everything remains quiet in the center.
The Allied left is about to be heavily engaged as the bulk of the French army is on this side of the field. Using the reverse slope combined with the intermittent rains really prevented musketry from being a deciding factor. In the heavy rain, which seemed to take up about 1/3 of the game, there was no musketry. In the light rain, it was at a -1. Everything would come down to melee.
Again, I missed a couple of turns here from all the dice rolling. The French cavalry brigade was demoralized and broke! A lancer unit did poorly and broke, then some dragoons decided to charge the square. The Spanish light cavalry counter charged and broke the French cavalry unit. Between those two lost cavalry units and the artillery, the brigade broke. The Spanish cavalry lost one unit as it ran from the field after a poorly fought round of combat. Typical.
The French manage a break through of sorts with one battalion breaking the corner of the line. The rest of the French aren't having quite as much luck as they're getting repulsed from their charges. The rains let up a bit and the Spanish were able to fire and weaken the attacking lines, which made the combats not so advantageous for the French.
The center of the line can now see some French fanning out to come attack the center. It's about the get bloody.
The Allied left is facing difficulties as the number of French units are making themselves felt. The Allied line here is thin and so if the French manage a breakthrough, they have the chance to roll up the flank.
Some of the upcoming French troops from the left flank also decide fan out toward the center. With the Allied right holding them back, maybe they believe the center is the weak point? Time will tell.
The center from a different view. The Spanish artillery really was a life saver for the Spanish as it inflicted a lot of damage from canister fire. With the French coming over the ridge, they were going to be hit soon. The battalion coming down the hill to try to fight it will also be broken from canister fire.
Cole's reserve brigade is being brought up as some of the Allied left units have broken. It won't be long and an Allied brigade will also break. The heavy rains have seemingly subsided so musketry is beginning to also take its toll.
Another French brigade broken! This valiant French battalion that did the break through has found itself in a trap and is eliminated in the musketry crossfire. This finishes off the brigade. The Spanish cavalry coming up around the far right will take over the position and reverse the flank.
Stewart's brigade is now not needed as a backup for the Spanish and so turns and moves towards the center where the next act is about to be played out. The Spanish artillery continues firing and inflicting damage.
Now the center begins the musketry duel as the French close in. The Italian battalion toward the bottom right will soon be broken as it marches across the Spanish artillery's line of sights and into the path of waiting infantry.
The Allied left lost one brigade and the French are continuing to press home the attacks. The French have paid for the continued attacks as they've had no real chance to recover from the disruptions. This is the most success the French have had up until now.
With the French all routed, the Spanish cavalry decided to try what Latour-Maubourg's troops did and turn the flank. It will take a while to get into a position as there is quite a bit of ground to cover.
The continued approach. Both commanders seemed to work together here to make sure they could try to deliver simultaneous attacks, which was a good idea. The longer they took, the more damage they were taking and so time was not on their side.
Cole's men plugged the gap on the Allied left. With fresh units now place, the French attempts to break through were greatly decreased. Not pictured was a couple of rounds of melee in the center which cost each side a battalion or so and really did nothing. The Spanish cavalry managed to come after another French battery trailing the infantry moving to the center.
It was getting late and we had to call it a draw. The village was worth 1pt and each broken formation was also worth 1pt. Both sides had 2pts and it's clear that in another couple of turns, the French probably would have lost another brigade and that would have taken the French from the field. We did not expect the Spanish to do so well but I think the French aggression worked against itself in that even though there was rain, they made minimal to almost no attempt to weaken the Spanish lines first. I think their artillery could have been brought up and used much sooner than it was. Despite the quality issues, the numbers made up for the quality differences and allowed the Allies to hold the line.