Translate

Showing posts with label Lasalle. Show all posts

Wednesday, January 26, 2022

AAR: Battle of Gunzburg, October 9, 1805

Mack Disregarded his officers' recommendations to retreat to Vienna and opted instead for an active defense in and around Ulm. Mack Ordered d'Aspre's force to defend the Gunzburg bridges. Meanwhile, Ney was ordered to take all the bridges between Gunzburg and Ulm in order to link up with Lannes and Murat who were already on the south bank of the Danube. Ney quickly moved Malher's 3rd Division towards Gunzburg with orders to take the bridges.

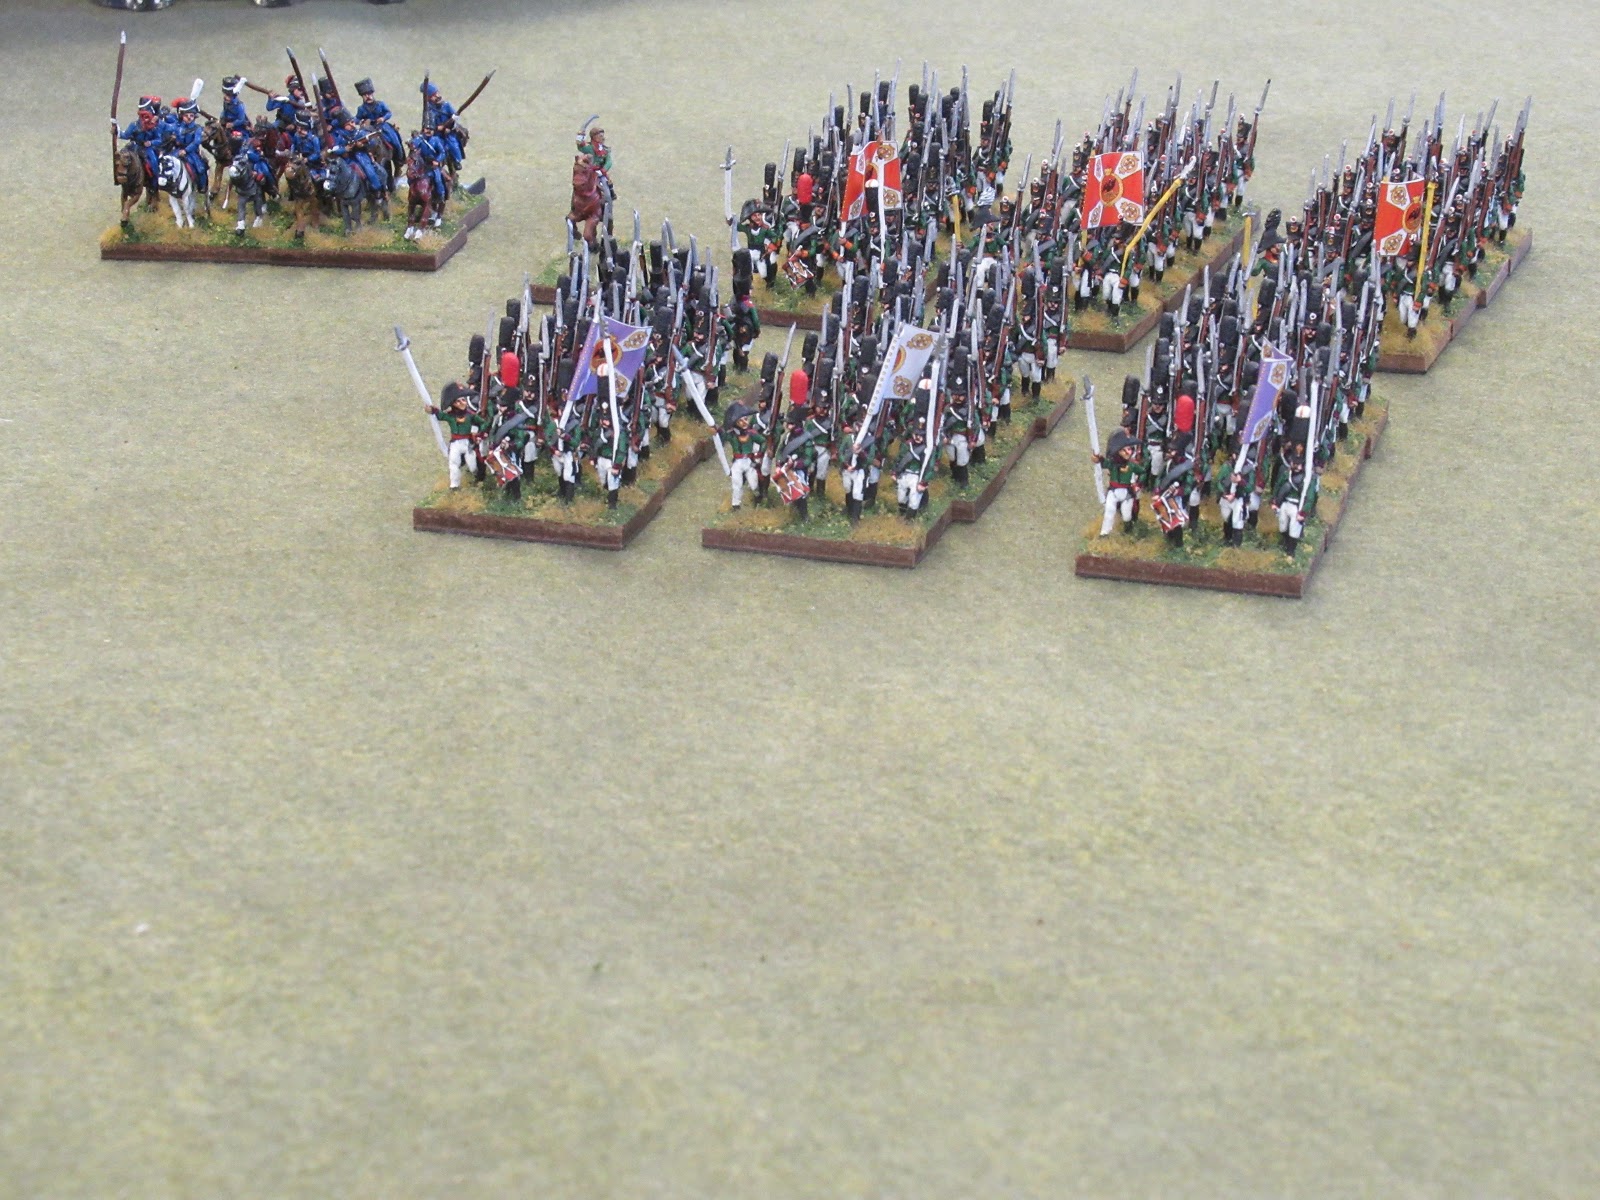
 Austro-Hungarian center around Gunsburg. Ruffer's command is defending the crucial center bridge.

 
Austro-Hungarian units on the right around Reisenburg. De Melgum's command is around here. 
 
 
The Austro-Hungarian left around the village of Leipheim. Reinhardt's forces on this flank protecting this bridge.
  
The French under General Mahler's ten battalions all enter onto the field from the main road and fan out to the flanks. Going against the town of Reisenburg has been assigned to a battalion of converged elite companies under General Lefol.   
 
Up to the center. The artillery on both sides are hampered by forested areas all long the river. This works against the interest of both sides as it prevents softening up defenses or offensives. It is all going to come down to the bayonet. 
 
General Lebasse's two battalions of the 59th Ligne can be seen going for the bridge at Reinhardt. The yellow 4-sided dice are representing damage done the the bridge by the defenders. Before the French can make it all the way across, the French sapeurs have to successfully make a repair. Michael Hopper's scenario doesn't call for multiple damage points and doesn't permit destruction of the bridges. So we decided to try potential multiple damage points to see how it would play out. 
 
The French here are also attempting to get onto the bridge to conduct a repair with the sapeur as seen in the bottom right of the picture. 
 
After clearing some of the damage, one of the early assaults pushed this leger battalion back across. This will repeat until turn 12. Assault after assault here just could never break into the town of Gunzburg.

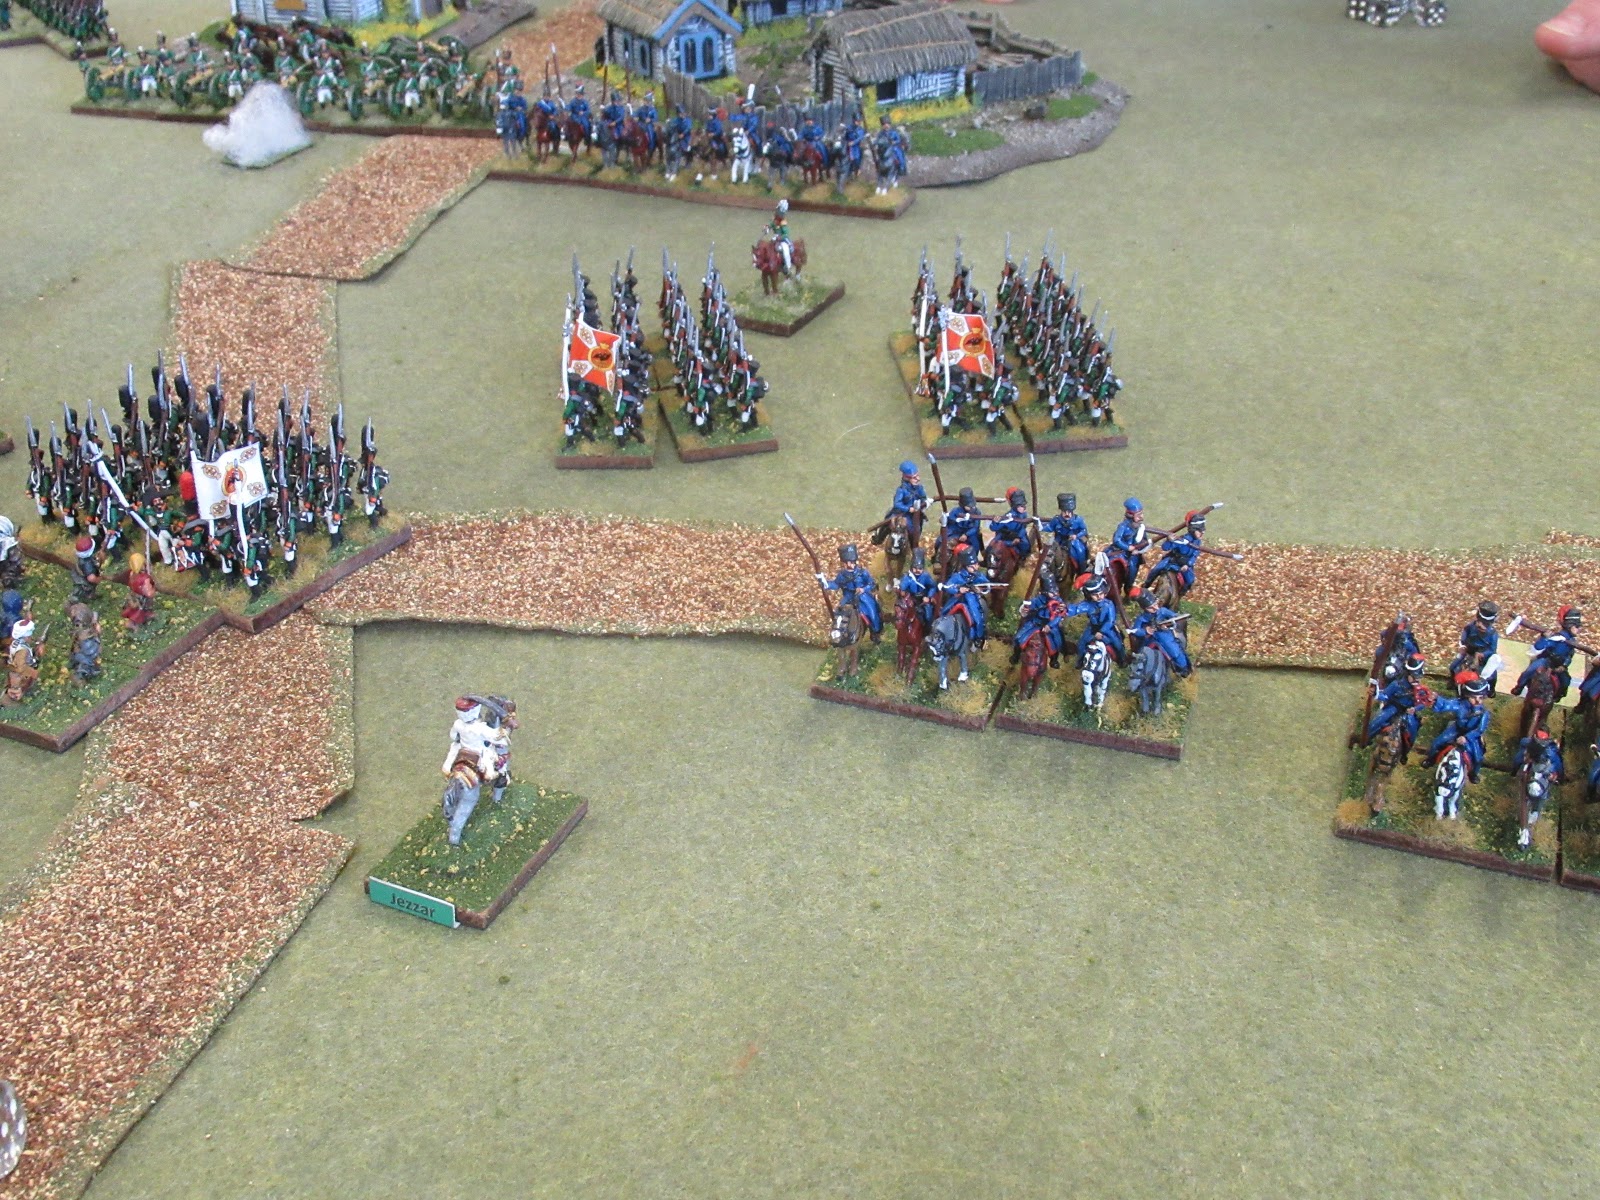
No, the defenders didn't all break and run... well yeah, actually they did. I forgot this flank as I didn't think this lone elite battalion could do anything more than tie down units here. As it turned out, the Austro-Hungarians came across the bridge and prepared to attack. The French didn't wait for them to position themselves and attacked and broke two infantry battalions and repulsed the Austrian kuirrasier unit without the need for square. Because this command was effectively demoralized, it broke. All that and I didn't have a chance to picture the only successful part of the field. One bridge is captured.

And this image is effectively all that happens on this flank for the entire game. The Austro-Hungarians here only got their flank shot by the French guns before they high tailed it behind the trees (you can sort of make them out). The enemy infantry kept lively fire upon the French as they attempted repairs just as fast as the enemy could inflict them.

 
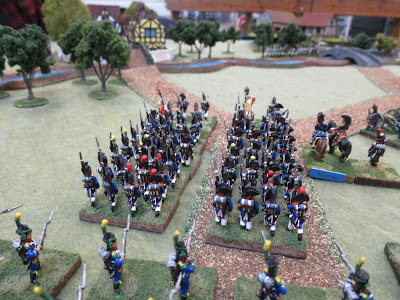
To add some pressure to the center and take advantage of a non-existent Austro-Hungarian right flank, the converged elites storm the hill and move to the center as if in preparation for Austerlitz a couple of months later. The Austro-Hungarian command now has to shuffle around some resources to stop this.


Austrian artillery is brought up to support this line battalion opposing this French advance. In ordinary circumstances, the line battalion would not do anything more than act as a speed bump.


With the damage temporarily repaired, an assault into the edge of Gunzburg commences. Will the hard work of the sapeurs and leger finally pay off?

This battalion of the 59th ligne had to back off the bridge voluntarily. Too much hot lead was inflicting disruptions that were risking the unit being broken. The enemy sappers are able to keep damaging the bridge. Maybe the idea for accumulated damage for bridges wasn't necessary.

 
The damage has been cleared and another assault on the town's edge is conduct. The enemy unit protecting the flank of the town is now free to down toward the river. Lefol's converged elite battalion has backed off once combined arms of infantry, cavalry and artillery are brought up. Only the Austro-Hungarians have any cavalry and if for nothing else, will cause some French hesitancy for turning the entire flank and hitting the center.

 
The French guns are silent with nothing to target. The infantry and sapeur labor in vain as can never get far enough across to assault the Austro-Hungarian troops. 

For a minor victory, the French only need to secure one bridge and that minimal objective was achieved. Historically, the above flank that was turned, not the other end. In conclusion, I don't believe the scenario written by Michael Hopper in Rise of Eagles is in anyway wrong, just the rules in Lasalle don't lend themself to assaults in columns for assault across a bridge. The forested areas also prevent line of sight and so the artillery has no real effect. We still enjoyed the game and more unique situation of the scenario.

Sometimes, repeating historical results are more difficult than it might appear.

Tuesday, October 13, 2020

New Napoleonic Scenario Books

Announcing a couple of new scenario books that cover any Napoleonic rule set. These books are now available for preorder. If you have any of the previous scenario books from Michael Hopper, then you know the detail and quality of the material presented.

I have reviewed previous books on this blog http://thepeninsularwar.blogspot.com/2018/05/new-napoleonic-scenario-books.html and http://thepeninsularwar.blogspot.com/2017/12/review-eagles-over-bavaria-duel-of.html So if you want new material and wish to continue supporting the hobby, please take a moment and consider purchasing these books from Michael. You can contact Michael for a purchase at log1cal.mh@gmail.com.

As with previous books, when my copies arrive, I will do a full review of the books. If you know other gamers who would be interested, please share this information with them. Good scenario material that works with any rule set is not common enough. If you have ever wanted to put on a historical scenario and have found that the information available is sketchy or time consuming to put together, save yourself the trouble.
 

Friday, September 4, 2020

More Battle Honors Spanish Napoleonics


So during the last several months, my laptop has been down and with the Covid situation, I've had a lot of time. I have managed to get plenty of things done. I had been wanting to replace the Spanish artillery I had with Battle Honors so as to match what I already have.


I decided to just paint and add the trail ammo chest. Gives a little more detail to the stand. It would have been nice is the set had opened chests, but I guess that wouldn't look good for putting it on the trail if someone wanted to do so.
I didn't need to paint another infantry unit but the Battle Honors figures are quite nice and I did have one last set of flags that needed to go somewhere. I decided to do this unit with green facings, since I didn't have a battalion with those colors.
Rather than just paint dull brown pants on some models for the worn look, the tiki striped pants were common enough. With a good bush, steady hand and free time, it isn't so bad.
Each bag contains three sets of command. In of itself, that's not bad. What's not real useful is that the command figures are identical and so you don't have an option for a different officer. A small matter to be sure, but Tony Barton did go so far as to model some soldiers with either no shoes or sandals.

 It only occurred to me after I uploaded the pictures and put everything up, but a rear shot of the grenadiers would have been good. I did paint the elaborate flamme according to other designs I could find online. When I get them onto a table some day, I'll capture a shot of them from the rear.


Sunday, March 10, 2019

Russo-Ottoman War 1806-1812 Debut Battle

After years of work by myself and another gamer who contributed to the Ottoman painting and the terrain, my Russians and Ottomans are now meeting to begin their war. Here we have the Russian center and right coming quickly onto the field in march column to get at the waiting Ottomans.

The Russian left has the Siberia grenadier regiment and Olonetz musketeer regiment escorting some cossacks. This flank will be making contact first as they show no fear of the Ottoman forces they are facing.

The Ottoman left has a cavalry brigade backing the army's heavy artillery. The battery has a dominating presence that the Russians will feel as early as turn 1.

The Ottoman center is a bit weaker, comprising of militia units and a foot battery with medium guns. The woods are going to be their real defense in slowing the Russian advance as a barrier.

The Ottoman center remains relatively quiet for the first few turns. Only the Ottoman artillery could make itself felt by hitting the fast moving Cossack cavalry who were screening the Russian advance. A few shots found their mark and the Cossacks decided not to move any closer to the guns.

The Russian left continues to march up, unconcerned with deploying for action this far out. Their fast marching didn't give the Ottoman right much time to perfect their ranges of the artillery.

The Russian center is moving a little slower. The foot battery is still limbered and the Russian player is contemplating just exactly how to move between the obstacles and appear right before the waiting Ottoman guns.

The 5th Jagers are attempting to slip around the church and get up and clear the woods. Backing them is the Russian horse artillery battery that is attempting counter-battery fire against the Ottoman heavy battery just opposite it.

Here the Ottoman right waits for the Russians. They considered coming out to meet the Russians head on but were no confident the odds would be in their favor. Those tall black plumes indicated grenadiers were coming.

On the Ottoman left, the squadrons of the Belarus Hussar regiment are looking to clash sabers with the Ottoman sipahis cavalry. Maybe they could not see all the Ottoman cavalry stacked up behind the guns?

The Ottoman cavalry struck first. Preferring to counter the superior quality of the Russian cavalry with numerical advantage, the chance move was to pay off with a victory over the hussars.

One of the Ottoman militia units has now come into musketry range of the lead grenadier battalion. The single disruption caused would prove to be entirely useless for the upcoming turn.

The Russian infantry moving up is a feigning gesture as they cannot initiate contact with the Ottoman cavalry. They are probably hoping the Ottomans will surge forward and smash themselves uselessly against squares. I would not oblige.

The Russian center is beginning to take hold as the foot battery came up and unlimbered in canister range of the Ottomans. Some Cossacks are positioning themselves for a quick strike at the Ottoman battery before them.

The Russian battery managed to force the Ottoman battery to limber up. As it turns out, the other Ottoman battery experienced the same dilemma and was forced to limber. Limbered guns cannot fire and now the Cossacks are feeling much braver.

And as expected, the Cossacks surge forward. As it turned out in the combat, the Cossack were clumsy and did as poorly as possible with the dice rolls and were thrown back. Lucky me as my guns are saved.

A couple of grenadier battalions charge into the Ottoman militia unit at the upper right. Some other Cossacks are coming up and looking at engaging the Ottoman cavalry.

The Russian grenadiers are now on contact. They will break the front battalion with ease and will advance to complete their break through of the Ottoman right.

The jagers form into line and continue to meander their way forward. Do the woods make them uneasy and so they don't rush in and clear them? Or is it all that Ottoman cavalry that has them concerned?

As mentioned above, the front Ottoman battalion collapsed immediately. This second one is facing the same scenario. The Ottoman infantry is inflicting a few disruptions upon the Russians with musketry, but rolling poorly in combat won't allow them to hold on.

And here is where I made a mistake. After just barely beating off the Cossacks in the previous combat, I somehow forgot to move this battery or unlimber it. Had I just umlimbered it and opened canister fire upon the infantry, it would have slowed the Russian onslaught. My mistake gave the Russian infantry the chance to eventually charge into the limbered guns and break it.

The Ottoman cavalry managed to destroy part of the hussars but the rest the remaining squadrons of the Belarus Hussars attacked and were repulsed from their charge. The Ottoman heavy battery is back in action once again.

My neglect allowed my battery to be hit by some Russian infantry. The Cossacks decide to be aggressive and go after the Ottoman cavalry.

So as it turned out, the jagers were perhaps concerned about the bulk of Ottoman cavalry waiting for them. The jagers successfully formed square and managed to throw back the first charge.

The hussars and Ottoman cavalry decide to go at it again. All the Ottoman cavalry here makes any victory by the hussars useless due to the numerical odds.

The overall view of the tactical situation. I am surprised the Russian players both opted to ignore the villages and not waste troops holding places that had no value to winning the scenario. Most players cannot avoid these black holes that suck up manpower that could be used elsewhere.

The extreme end of the Ottoman right is practically gone and now some Russian musketeers are attempting to engage and finish off the flank. An Ottoman cavalry unit eyes a chance to hit some surprised Russian troops.

The Cossack's luck was in play as they both managed to win decisively and break the Ottoman cavalry they charged. Just out of the camera's lens are two more Ottoman cavalry units they will now have to face off against.

The Russian foot artillery continues to blast away, unopposed. The Ottoman infantry partially in the woods is getting sprinkled with long range canister fire.

And here we say goodbye to what's pretending to be the Ottoman center. As it would turn out, the grenadiers held a near perfect success anytime they made contact. The Lasalle Rules for a Valiant rated unit against a Shaky unit is significant. On top of poor dice rolling, the grenadiers have the punch to break through about anything.

The Ottoman right has routed and now the Russians begin their wheel toward the center to wrap it up and call it a day.

Two Ottoman cavalry units remain but since their command has broken, they will flee the field and deprive the Cossacks of another taste of combat.

The jagers had pushed off the first Ottoman cavalry charge while in square and thought that they would have no more trouble. As soon as they changed back into line, the cavalry took advantage of the situation and hoped to obtain an easy victory.

And here we see a parting shot of the batteries attempting to duel it out. Some Ottoman cavalry attempted to snake around the village to hope for a dash at the Russian guns but the battle is lost. The Russians chose to get into close combat and not exchange fire with the Ottomans and it worked out well.