Translate

Showing posts with label Grand Tactical Napoleonic Gaming. Show all posts

Tuesday, October 13, 2020

New Napoleonic Scenario Books

Announcing a couple of new scenario books that cover any Napoleonic rule set. These books are now available for preorder. If you have any of the previous scenario books from Michael Hopper, then you know the detail and quality of the material presented.

I have reviewed previous books on this blog http://thepeninsularwar.blogspot.com/2018/05/new-napoleonic-scenario-books.html and http://thepeninsularwar.blogspot.com/2017/12/review-eagles-over-bavaria-duel-of.html So if you want new material and wish to continue supporting the hobby, please take a moment and consider purchasing these books from Michael. You can contact Michael for a purchase at log1cal.mh@gmail.com.

As with previous books, when my copies arrive, I will do a full review of the books. If you know other gamers who would be interested, please share this information with them. Good scenario material that works with any rule set is not common enough. If you have ever wanted to put on a historical scenario and have found that the information available is sketchy or time consuming to put together, save yourself the trouble.
 

Sunday, May 6, 2018

New Napoleonic Scenario Books

In the ongoing publishing of scenario books for the Napoleonic Wars, Michael Hopper's soon to be released scenario books 3 & 4 finish up the 1809 campaign. As long as demand remains, these scenario books will continue to be published. Other theaters and years are planned in the future and this is the time to show our support for the work put into constructing the information into a usable form for wargamers to use.

As with previous scenario books, Michael Hopper has made the information within the scenarios detailed enough to convert to any rule set you use. That flexibility makes these books useful for anyone in Napoleonic gaming. With the expected official announcement of release later this month, be ready to obtain your copy while supplies last. Spread the word and let's support the time and effort put into this creation for our benefit. You can contact Michael about ordering his books at his email address: log1cal.mh@gmail.com

You can see my review of the previous two books here.

Thursday, August 3, 2017

New Napoleonic Scenario Books


Finding good scenario books is a challenge as most are rule set specific and often won't translate well into other rule sets. Sometimes scenarios that are available are all too common and frequently too large for many gamers to get involved in. Napoleonic gamers know of Wagram, but not many are aware of the smaller battles leading up to the climatic battle itself.

The first two volumes of the 1809 Danube campaign are now ready for you to reserve. Two more scenario books for the 1809 Danube campaign will follow shortly. These volumes, produced by the venerable Michael Hopper, author of Rise of Eagles, is producing a line of scenario books with many smaller unknown scenarios. The first two are fairly extensive and represent years of work and play testing to work out a finished product that any Napoleonic gamer would want to add to a collection.

These scenario books will only be produced in a limited run, so if you choose to wait you will miss out. If you want to own a finely produced scenario book to expand your game playing or inspire you to run a unique scenario with a chance of completing an entire campaign, this is your chance. You may contact Michael Hopper at: log1cal.mh@gmail.com

Tuesday, November 18, 2014

Montmirail February 11, 1814 Lasalle AAR

Using Lasalle, we tried a scenario outside of the normal scale of play. To do Montmirail, we had to do a few substitutions for the vast French guard units and artillery needed to play. Here is the center of the allied line with the Russian cavalry corps and with the infantry to the left of the picture.

The Prussian corps on the far left of the allied line. The Prussians lacked the number of cavalry for fast exploitation against the weak French right, or heavy guns with which to use canister. Everything relied on the slow moving infantry backed up by the lone hussar cavalry regiment while the landwehr cavalry regiment was back on the hill.

We see the Russian infantry trying to use their sheer number of battalions to simply drive the French back in a sweeping motion. French guard cavalry were quick into action here to try and use dense deployment against the Russians forming square. Sometimes it works, sometimes not so much. Russian artillery was generally ineffective in this scenario due to the inability to have line of sight to the enemy.

Some of the Russian battalions have disappeared it will be noted. The guard cavalry was probably handled a bit more aggressively than done so historically, but without it there was little hope of holding the Russian infantry back until the Old Guard made their full appearance.

The Russian cavalry corps advances forward in a rush. The French have managed to pull up artillery on the hill opposite this line (part of which can be seen on the bottom left). One battery was silenced and the opportunity to move forward was now since all of the Russian artillery could not be deployed. The Cossack brigade on the right will receive a nasty series of clashes with guard lancers and part of the Empress's dragoons.

After several clashes in which the Russian cossacks were decimated, the guard lancers units were eventually smashed and driven from the field. The Russian cavalry managed to eventually obtain the upper hand despite the combat disadvantages.

Of the 12 Russian cavalry units beginning here, 8 remain (one is engaged against lancers as seen before). The guard cavalry have a good advantage in combat and the Russian cavalry here are neither heavy nor guard. Considering the Russian cavalry managed to eliminate a greater number of guard cavalry regiments, it was a tactical victory here.

As the Russian infantry numbers dwindled toward the middle, the French guard advanced and pushed as far forward as it could. Russian artillery now having access to line of sight, managed to form a bulwark that halted the advance any further on this point.


Here we see the Russian hussar unit after it finished off the last guard cavalry unit and occupied the position. This inadvertently held up the guard infantry reinforcements here and they were forced out of march column to face the cavalry. Not pictured, the hussars behind are going to assault the artillery battery and start working on the infantry coming up, now without cavalry support.

Here we can see the guard has managed to carve out a large area of domination on the Russian right. The village on the upper left has now been taken by the French and Russian infantry casualties have continued to mount. The center of the line proves to be too much for such a brazen use of the guard, but the guard do not die easily.

This image demonstrates the Russian line being broken in some areas in bitter fighting. Not having Russian cavalry here and having it all concentrated into a corps in the center of the line has proven that historically, the allies haven't yet mastered combined arms being necessary for victory. To the upper right, artillery is now able to deploy, but with no real expectation of any proper support.

The Prussian advance has finally made a noticeable achievement. The leading Landwehr infantry unit will be wiped out, but the remaining units are able to handle the incoming fire now that numbers can be brought to bear. The Prussian artillery has managed to temporarily silence the guard horse artillery batteries off and on during the game. The Dutch 2nd Red Lancers can be seen before their demise in the upper background, as previously mentioned before. We had to use artillery stands not properly based for the rules because the scenario called for so much artillery that we couldn't get it done in time for the game. As such, the space between the batteries was to maintain what would be the proper frontage.

A French battery forced to limber up from counter battery fire. Although the Prussian guns did little damage, they did prevent lots of French fire during the game and prevented any serious loss of the Prussian column. The last guard cavalry unit here (I guess other squadrons from the Red Lancers) is being occupied by the hussar cavalry regiment. Clearly a gamble on my part, but I knew the enemy would not risk attacking the infantry when they could be hit with cavalry with a counter charge at the same time. With the hussars being valiant, they were a fair match.

The guard cavalry can be seen attacking everything here. Before the advance of a Russian battalion toward the center to avoid being hit by their own artillery, an Old Guard battalion rushes some artillery. The attempt to cut the line in two seems to be working.

It may be hard to see here, but there is a battalion of Old Guard infantry that has made it deep in the Russian line here. The Russian battalion now seen behind it decided to seal it up and hoping the canister fire would eliminate it. The bend in the Russian line here is clear to see and artillery poses the largest threat to the rampaging guard units.

This image is taken as the last turn we played during the game. The hussar cavalry make a go at the lancers as they entered the woods and the landwehr at the bottom left, attack the limbered guard battery. We did not resolve combat here, but the guns were clearly going to be losses and the cavalry clash probably would have ended indecisively for me unless my opponent rolled poorly.

I had enough movement for both units to make contact on the single battery. Image appears to have been taken during movement, but the battery on the left is limbered (we did not have enough limber models, this why it is turned about) and will be hit with the landwehr cavalry and likely eliminated.

Here we have another follow up to an earlier attack but with the Russian hussars hitting another French battery. In the upper left, we can see two Russian cavalry units have charged the weakened (and almost broken) Old Guard battalion that had been such a battering ram.

Another parting shot of the battle. My fellow player commanding the Russian infantry had to leave at this point and as we began counting the losses, we wonder how it would end. This is turn 16 of 20 and the Russians have lost 13 infantry battalions here.

A parting shot from the French corner. Although it appears the Russians have a numerical advantage still, the losses the Russians have taken would have been too high for them to have stuck around any longer. The Prussians could have rolled up the flank given the sheer numerical advantage. The Russian cavalry held up the guard infantry in the center and Russian artillery able to deploy; but to what end? The French had possession of half or so of the objectives and much of the Russian infantry remaining was already suffering from disruptions. The close proximity meant the the Russian infantry had greater difficulty in rolling off disruptions.

One cannot call it a French major victory due to the guard cavalry be so mauled and the guns that would have been lost. It is likely though the Russians would have fallen back and left the field. The French would not have been able to launch any follow up (as the only cavalry left to speak of were not pursuit cavalry). Having 18+ unit losses from the allies and about half that for the French, we decided to call it a tactical French minor victory. Using a historical setup reveals some mistakes the allies made. Had the Russian infantry and cavalry been more evenly distributed, I believe things could have been different. Had the Prussian wing had a full brigade of cavalry from the Russian cavalry corps, the wing would have been turned quite quickly. But Prussian general Yorck was not in charge and Russian general Osten-Sacken's deployment was the leading cause of the historical and game's loss for the allies.

Thursday, November 17, 2011

Review: Grande Armee Rules


Grande Armee rules are one of the most unique rule sets in existence for the Napoleonic wars. The Napoleonic wars generate much enthusiasm because of uniforms, tactics, the personalities and epic battles of masses of infantry, waves of cavalry and batteries of artillery all fighting for supremacy.

Did I miss anything? So why is it most gamers end up playing games where at best, they may command a full division of troops? Lack of time to paint or money to buy painted figures? Lack of space perhaps to play or interest in such epic battles? Well when we look at the masses jumping on the 28mm plastic ranges now available, that doesn't appear to be the issue at all. Can't really even get into the personalities commanding a brigade or division, can you?

It must be the painting then. In this case, they who play such levels of command must like unique uniforms of specific units so this is why so few figures make it to the table. Well again, not so much it appears. Take a gander at most sites and you see generic line units (yeah, you might number them but did you paint the facings correctly? How about the flag?). So what is it?

I'm at a loss to understand it because I'm the type who has no problem using units of over 30 figures to represent a unit. You'll find the majority of my armies have specific units painted, correctly. I have many generals that are specific personalities. So am I different?

The short answer is yes. Grande Armee is a game for those who enjoy grand tactics and who aren't Stalinists demanding absolute control over every function a battalion can make. That scares a lot of players off that they can't form square, column or break into full skirmish. Grande Armee has all of this, you just don't see it.

That is what being in command of an army is all about. Even as a divisional level commander, you're not going to have time or the need to write orders for every colonel in your division to form this or that with their battalions. Grande Armee puts you in command as an army commander, with all the ability to screw up or have a subordinate general or marshal screw up in your place.

Grande Armee rules have been in a published form since 2003, when Sam Mustafa introduced them to the public. My first game was around 2006 with them playing the battle of Bussaco. It was a real struggle to be able to delegate enough command points to keep my corps commanders in line to do what I wanted. Ironically enough, what won me the game was Marshal Ney's bolt from a timed attack into an all out assault which routed the British off the northern end of the hills and opened their flank and exposing their entire line. I lost control and my subcommander, Marshal Ney had won the day!

Grande Armee is supposed to be played with 3"x3" trays with your brigade arranged however you can fit them on board. The mega stand then represents about 900 square yards where battalions and waves of cavalry are lined up, in columns etc. As a brigade, they may have multiple mixed formations and so the footprint is the zone of control for that brigade, space between units etc. Your brigade commanders that you do not see or give orders to are assumed to know what formations are appropriate. You give commands to divisional generals or marshals, depending on your army structure.

That is the big thing about Grande Armee that causes most to frown with disgust at how they cannot micromanage every man.

Turns do not have a specific time equation and have pulses (mini turns in the turn segment). When rolling for initiative for pulses after the first one, if the colored die rolls a number equal to or less then the number of just-completed pulse, then the turn ends whether you want it to or not. Each turn you roll to see how many command chits (I prefer the term points, but whatever) you have to distribute to your division or corps commanders. Your roll combined with your army general's command rating are used to determine how many chits/points you may receive and use. At the end of every turn, any unused points are lost.

You must use the chits wisely to determine who really needs to move, who needs to rally and needs extra chits to affect the dice roll. Again, another level of higher command that you can try to influence an action but you cannot guarantee to do it because it is ultimately out of your hands. So you must manage your limited resources (chits) and do what's most important. If you don't have enough chits, then your commanders act on their own rating ability and or distance from the enemy.

In short; if they are aggressive they will move forward towards the enemy. If cautious, they may fall back. If they are more level-headed, they may just hang tight. All fairly understandable stuff here.

Morale and casualties are essentially one in the same. Every unit has a specific number of hit points, typically between 5-7. This number is not arbitrary, it is based off of a formula. For example, a trained infantry unit is worth 1pt per every 500 men. In a brigade of 3500 men, this would mean 7pts as its strength. If it were a veteran unit, 1pt per every 400 men. The morale or training level and strength determine how long a unit can stay in battle. That strength number is also the number of attack dice the unit has. Easy to keep track of. When a unit loses strength, it cannot attack as hard as it once did. A simple roster is kept and the number is crossed out and a new number put in its place. When it reaches "0", it has routed, but may rally and can roll to see if it comes back with any number of reduced strength points. You can generate lost strength back into the unit up to one point less than what it started or rallied with. It never comes back to full strength.

So the morale, strength and damage are all rolled into one number. 6 sided dice are used to carry out attacks and you may receive saves depending on cover or type of attack. Cavalry work the same way but may avoid combat if they want. Shooting only exists as a skirmish attack or is considered part of the overall melee assault. May seem like an overall simplification, but one set of dice used to control multiple things saves time and in the end and doesn't really give you any different results. Rather than roll for shooting with some dice, then melee, and someone taking a morale test, you get it together. If your enemy is a distance away, all you get are skirmish attacks, which can still inflict damage.

These methods of play seem foreign and somehow wrong to the control freak who wants to waste more time rolling more dice to do the same thing in the end. They can't comprehend that you do not lose stands in combat, have to keep a roster and your opponent will never know your exact unit strength (which is a good thing). They dislike the idea that your artillery isn't as effective in the mud, which these rules cover. Cavalry evading a charge or being used to prevent enemy skirmishers from being able to carry out attacks within 6" (because the skirmishers would just be ridden down and so hide behind or in the parent brigade) seems to confuse them with it's accuracy and simplicity.

One more thing, this review would not be complete without mentioning movement. This part will really scare the control freaks - you know the minimal amount of distance you can move but will have to guess the maximum distance you can move. All units have a base movement, for infantry it is 6". You roll a 6 sided die and add that to your brigade movement rate. If you rolled a 4 and added that to your 6" move, you would have 10" maximum this pulse. You don't have to move but 2" if you wanted, but you have to use some planning and forethought in your moves. Once you're within 6" of the enemy, your units may only move backwards or forwards.

If your commander over this brigade, like Marshal Ney controlling the 3rd corps at Bussaco, is aggressive and you don't have enough chits to control him, you'll roll a die against his control number (I believe a 3). If you roll equal to or less, you can refrain from just attacking and do what you want. If you fail, he rushes forward whether you want him to or not. You might be the mighty Marshal Massena of the Army of Portugal but you're commanding officers who don't always get your orders right, especially when the enemy is right in their face. It's called friction.

Say what you want, but it is very much realistic in being a simulation of an army commander, unlike Age of Eagles, which uses brigades but retains all the micromanagement (thus making the game drag on). Don't like 3" movement stands? Neither do I. Mine are now being mounted on 1.5"x1" stands, with 6 stands per brigade. That forms a 3"x3" square, my front two stands are skirmishers (again, very realistic) but it leaves me the option to still play Black Powder with smaller, multiple stands and it is perfectly based for Sam Mustafa's Lasalle. It ranks as the best I've played to date.

You can purchase Grande Armee through Scale Creep Miniatures. http://www.scalecreep.com/catalog/

Thursday, November 11, 2010

Battle of Salamanca (Los Aripiles)


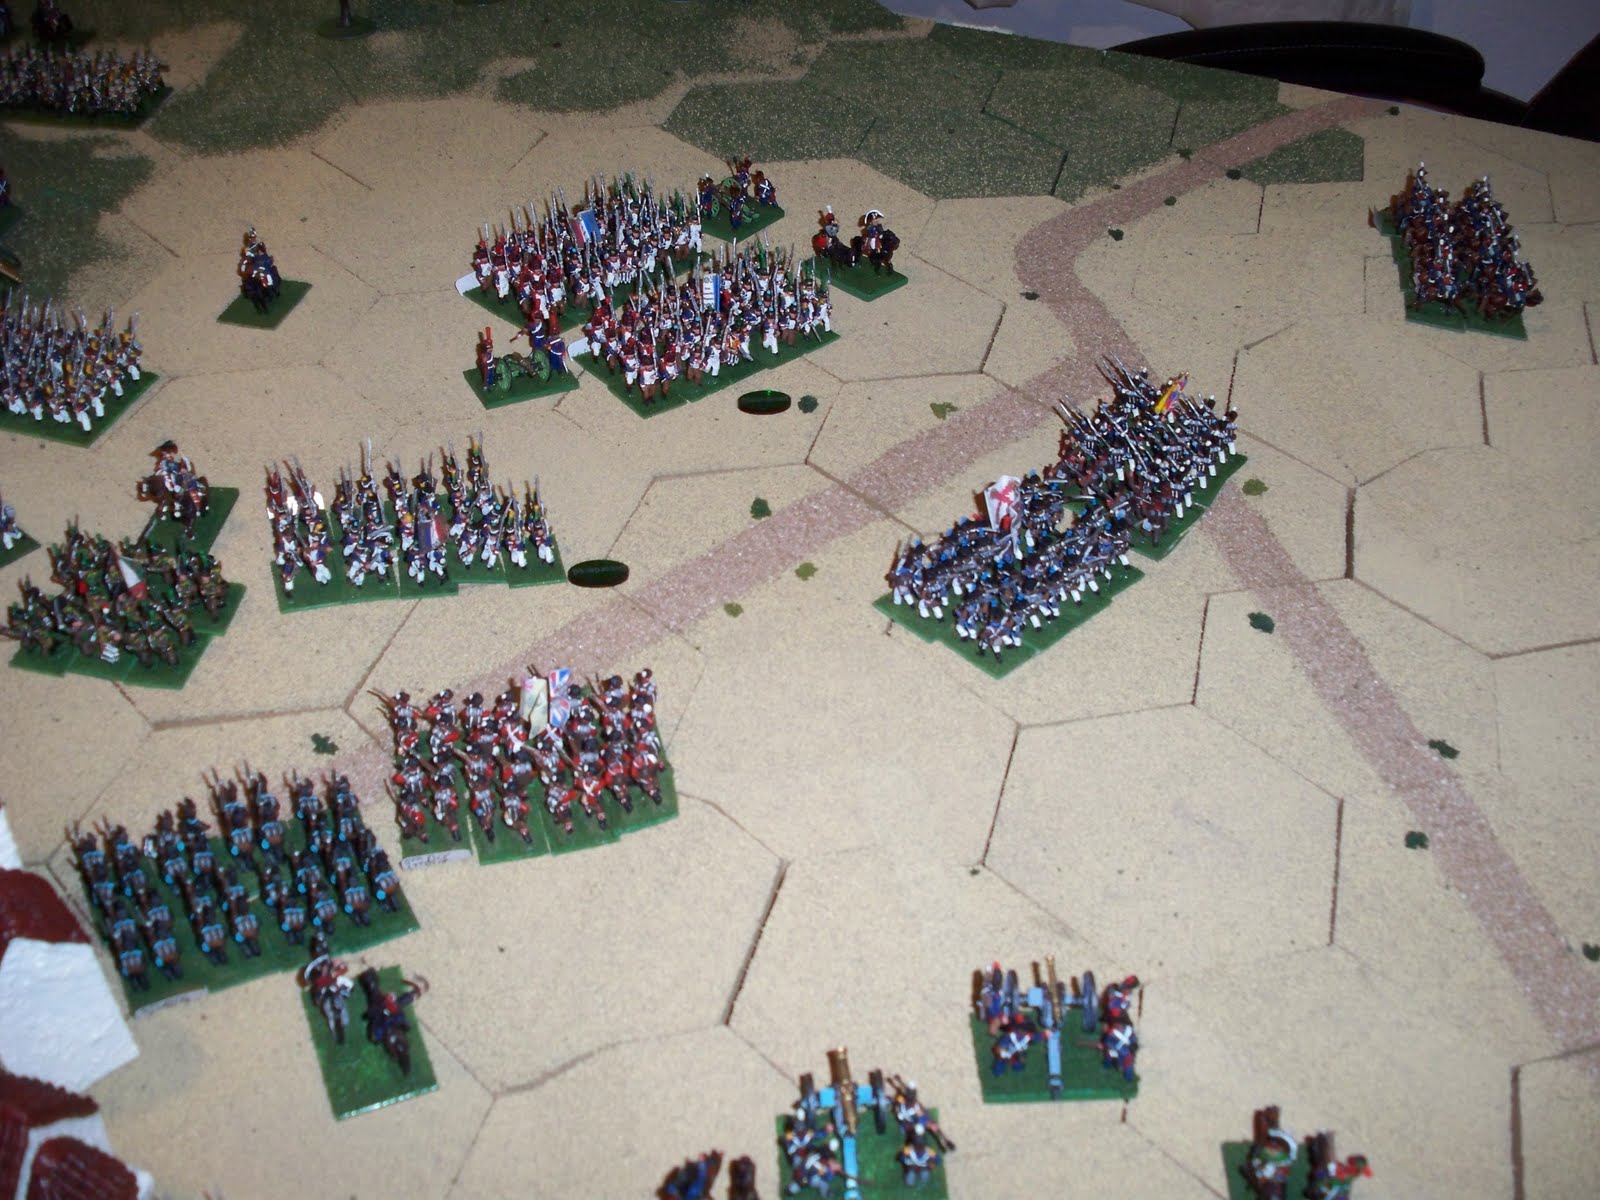
After much painting, modeling and time, I finally got around to playing this scenario at home. I had played it at a local game shop with very similar set up with the British clearly winning the day and mirroring the real battle in so many ways. In this scenario, I am using a modified version of Fire and Fury. I enjoy these rules as they are simple and allow for various sized units and formations. In this scenario, I made unit sizes a generic average, but managed to keep the numbers of actual combatants to correct numbers. British infantry unit brigades being 8 stands and French 10.

For game play simplicity, I decided to split both cavalry sides into one division of heavy and one of light. The British do have a slight superiority, as what was historically true with 18 stands to the French's 16. Using small cavalry units would be silly as they would simply be swatted away like flies. Combining them into "divisions" made game play easier and wasn't far off the mark from how they were grouped in the real battle.


I modified the rules for fallen leaders to include leaders up to 3 inches away. This would increase the likely hood of generals biting the bullet, unlike most other rule sets. Since my version uses two 6-sided dice, I modified the chart to accommodate all the rolls. No out of ammunition rules are used and commanders could be hit on a natural roll of an 11 or 12. I also decided to add an extra stand lost to each melee result on the chart to assist in game play not needing to take 6 hours to complete. The basic objective for the French was to hold ground for 8 turns in which it would be a minor victory as the British would call off the attack once it was clear it had failed.

Given my number of painted genuine French units is a bit short, some Italians, Poles and Germans are used to fill the places of exclusively French formations at this battle. If you see the 2nd Nassau regiment, understand it is being played as just a normal French brigade.


For the village of Los Aripiles, I had decided that no more 4 skirmish stands would be permitted to enter at a time. Whole brigades in the village seemed unrealistic and I did not want this place to become a drain to suck men away from more significant positions. I also did not choose to use limbers in this battle due to the fact I was one short for each side and that the playing area would have been even more difficult to play on. Even so, I still think the board looks great, even if I can't master the use of photography and provide up close action.

Turn 1

Pack's independent Portuguese brigade makes a run toward the Greater Aripile. It will take them the rest of their movement and half of next turn to climb the rough hillside and take the heights. Brennier's 1st Brigade moves on to the heights along with a couple of batteries of artillery.


Thomieres' 7th Division along with Curto's Light Cavalry Division continue to move west in march column. Packenham's 3rd Division moves forward at full speed to intercept. The British heavy cavalry are moving up to join in.

In the center, Clausel's 2nd Division deploys skirmishers to engage some men detached from Spencer's 1st Division deployed within the village of Los Aripiles. The resulting skirmish fire was ineffective on both sides.

Turn 2

Pack's Portuguese Brigade moves up onto the ridge and charges the 1st Brigade of Brennier's Division. The exchange of fire caused each brigade to lose a stand and become disordered. The ensuing combat was decisive and resulted in 3 stands lost to Pack's brigade and routed back off the hill. The French then deploy their batteries on top the uncontested hill.

Spencer's 1st Division moves to threaten Foy's 1st Division and Boyer's Dragoon Division. Foy in turn charges Spencer and is repulsed with the loss of 2 stands to and both leading brigades disordered.

Cole's 4th Division, 3rd Brigade moves forward to skirmish with the 2nd Brigade of Clausel's Division. The exchange was ineffective for both sides. Clausel's 1st Brigade's skirmishers attack the 2 detached stands from Spencer's 1st Division and managed to wipe them out and take the village of Los Aripiles.


Ferey's 3rd Division moves back north to come to the aide of Foy's 1st Division. Sarrut's 4th Division comes to the edge of the woods behind the Greater Aripile.

To the west, Packenham and Thomieres are closer to being engaged. Thomiers forms his men into a defensive position on a small ridge. Curto's cavalrymen form up and the artillery is deployed.

Turn 3

Spencer's 1st Brigade recovers from disorder and charges Foy's 2nd Brigade. The Light Division expands their frontage so that both brigades can charge together while Spencer's 2nd Brigade supports the Light Division. The resulting charge had a desperate struggle where both brigades loss 2 stands and the second roll gave the French brigade another two stand loss, effectively putting it out of action by being spent.

The British artillery fire from the Lesser Aripile manages to silence a French battery on top the Greater Aripile.


Curto's Light Cavalry Division reposition themselves to permit the accompanying horse artillery battery a better view of the enemy. The artillery fire from the guns did nothing to slow Packenham's inevitable advance.


Cole's 4th Division, 3rd Brigade, charges Clausel's 2nd Brigade and loses a stand from shooting as it closes from combined fire of artillery and musketry. The French brigade is pushed back, rallies and then charges and receives a desperate struggle roll, then inflicts a further two stand loss on Cole's 3rd Brigade and pushing them back. This effectively shattered this brigade as it made them spent.

In the village of Los Airipiles, Leith's 5th Division, 3rd Brigade, detaches skirmishers that attack the village. The defenders put up a valiant struggle and inflict a 2 stand loss on the attackers and retain control. Bonnet's 8th Division proceeds to march west to assist Thomieres' 7th Division. Sarrut's 4th Division pushes out of the woods and into the small valley behind the Greater Aripile.


The break through from Spencer's 2nd Brigade hit Foy's 1st Brigade but this time Spencer's 2nd Brigade suffers the loss of 2 more stands and is routed (represented by the dark green coated KGL troops). Foy is a bit closer to receiving support from Ferey's 3rd Division.


Packenham's 3rd Division as well as the heavy and light cavalry brigades are formed up for a massive coordinated attack.

Turn 4

The allies' west wing makes the much anticipated charge. The allied light cavalry suffers 2 lost stands from Thomieres' 2nd Brigade during shooting and 2 more during the failed combat and were pushed back beyond musketry range. Thomiers's 1st Brigade suffers 1 lost stand from Packenham's 2nd Brigade during shooting, but throw the chargers back with no further loss.

The allied heavy cavalry slam into a battery of artillery on the flank. The artillerymen fail to hit the enemy during normal shooting, but manage through a desperate struggle roll to kill two stands and are themselves eliminated in the process.


The end results.


Cole's 3rd Brigade does not rally but does hold ground. Cole's 2nd Brigade advances through the 3rd Brigade to prevent their annihilation. Pack's Portuguese fall back onto the lower summit of the Lesser Aripile. Leith's 5th Division, 3rd Brigade, detach 2 more stands to assist in the assault on the village. The new assault fails and attackers suffer an additional 2 stand loss and are driven back.


Thomieres' brigades charge down the ridge into the 2nd Brigade and light cavalry. Thomieres' brigades are successful and manage to push Packenham's 2nd Brigade back and inflicting 2 lost stands and the disordered light cavalry rolls horribly and is wiped out to the stand during the combat.


De Espagna and Bradford's brigades advance to try and stem Bonnet's 8th Division as they move west toward Thomieres. Leith's 5th Division moves up to counter Clausel and Maucune's division from getting closer to Los Aripiles. The Anglo-Spanish batteries open fire on Maucune's 2nd Brigade that had advanced to assist Bonnet's Division, inflicting the loss of a stand.


Ferey's 3rd Division marches in range of Spencer's 1st Division, threatening their flank. Boyer's Dragoons Division moves up to apply pressure to the Light Division. The French deploy a 3rd battery on top the Greater Aripile.

Turn 5

Packenham's Division rallies. 2nd and 3rd Brigades charge Thomiers' 2nd Brigade and Packenham's 3rd Brigade moves left to cover the gap left by the surprising demise of the Light Cavalry Division. The allied Heavy Cavalry Brigade was barely able to rally and had to spend it's turn refacing towards the 7th Division. In the process, they turn their backs on the upcoming but distant 8th Division.


De Espagna and Bradford's men expand their frontage to prepare a charge against the westward moving Bonnet.


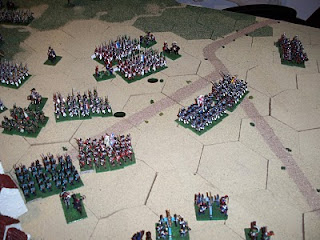
The Light Division charges Boyer's Dragoons, inflicts a loss of 2 stands and drives them back through Foy's 1st Division. Pack's Brigade was disordered from shooting and holds ground, but does not rally. Clinton's 6th and Hope's 7th Division being held in reserve behind Los Aripiles are beginning to move forward. As seen in the photo, Cole's 4th Division, 2nd Brigade lose an additional two stands from combined musketry and artillery. British counter battery fire damaged and drove off a battery between Bonnet's division and the Greater Aripile.

More men are detached for work in the assault on Los Aripiles. The allied assault had some success and eliminated 2 stands of the defenders and pushed them to the edge of the village.


Thomieres' 1st Brigade managed to inflict the loss of a stand upon approaching Packenham's 1st Brigade, then 3 more in the ensuing combat. The routed men were pushed past the deployed battery, leaving it wide open.

As seen a few pictures back, Ferey's 3rd Division made it to assist Foy. Spencer's 1st Brigade suffers a loss of a stand during the French approach from musketry and artillery.


Bonnet's 8th Division does not wait for De Espagna and Bradford to attack and charge. The charge into De Espagna was repulsed with no loss, but Bradford's men managed to roll a deperate struggle roll inflicting and suffering a 2 stand loss and then failed the subsequent roll and lost 2 additional stands and retreated beyond musketry range.

The 8th Division's artillery unlimbers for a flank shot against the allied heavy cavalry. Clausel's 1st Brigade recalls skirmishers that were pushed out of Los Aripiles. The 4th Division belonging to Sarrut moves off west.


Spencer's lead brigade was pushed back.

Turn 6

Pack's Portuguese Brigade roll badly and quit the field. Spencer's leading brigade charges Ferey's leading brigade. The Light Division decides to charge Foy's 1st Brigade in hopes of driving them from the field.


Leith's 5th Division goes on the offensive and its 1st and 2nd Brigades charge into some Brigades of Clausel's 2nd Division 1st Brigade and Maucune's 5th Division. The charge failed to do much and each side had a brigade pushed back a few inches.


During the defensive and offensive fire phase, the French managed to hit the allied heavy cavalry in front and back and cause the loss of 2 stands in each phase, thus bringing the cavalry to the spent strength when it completed its charge into combat. Thomieres 2nd Brigade was charged by both the heavy cavalry and 2nd Brigade of Packenahm's 3rd Division. The result was minor, forced the French brigade to fall back through and behind the horse artillery battery. Curto's Light Cavalry Division was charged by Packensham's 3rd Brigade and managed to inflict the loss of 2 stands on the attackers, quite surprisingly.


The major drama of this side was the remnants of Packenham's 1st brigade rallied and moved up and attached themselves to the foot battery of artillery. The exchange of fire between both of these units was insignificant (even at canister range, oddly enough) and Thomieres 1st Brigade was able to charge and eliminate the 3rd Division's 1st Brigade, capture the artillery battery and cause the only leader casualty of the game by grievously wound Packenham.


The combined Anglo-Spanish artillery managed to damage and silence a battery assigned to Maucune's 5th Division. British artillery on top the Lesser Aripile managed to silence the heavy battery on top the Greater Aripile. The French pull up a previously silenced battery to the top of the Greater Aripile.

Bradford's Portuguese Brigade did not rally but did manage to hold ground in disorder. De Espagna's Spanish Brigade was hit by both brigades of Bonnet's 8th Division. The remnants of Bradford's Portuguese along with De Espagna managed to inflict the loss of a stand and disorder the 1st Brigade of Bonnet's Division. Despite the fact that De Espagna's Spanish Brigade was outnumbered more than 2 to 1, they managed to only be pushed back and suffered no losses.


To the upper right in this picture, you can see where Clausel's 1st Brigade and Maucune's 2nd Brigade engaged with Leith's 1st and 2nd brigades. Maucune's men manage to push Leith's 1st Brigade back to the ridge beside Los Aripiles with no loss. Clausel's 1st Brigade was able to inflict the loss of 2 stands on Leith's 2nd Brigade and push them to the gates of Los Aripiles.


Clausel's 2nd Brigade charged into the shaken 2nd Brigade of Cole's 4th Division. After a desperate struggle roll and inflicting 2 stand losses from both sides, a second resolution roll resulted in Cole's 2nd Brigade collapsing after being reduced to one stand. The follow up break through charge hit the spent 3rd Brigade of Cole's division. Fortunately for Wellington, this brigade only fell back to the muzzle of their own battery directly behind them and did not shatter.


Spencer's 1st Division, 1st Brigade suffered the loss of another stand from artillery fire. The charge from the 2nd Brigade of Ferey's 3rd Division was bloodless and the French fell back outside of musketry range. The Light Division charged Foy's 2nd Brigade and took the loss of a stand during shooting and were likewise, thrown back beyond musketry range.


The remnants of Cole's 4th Division.


The final view from the allied center.

Conclusion: the allies suffered badly and the game was called after 6 turns only. The previous time the game was played, the French lasted about 6 turns and were basically demoralized. This particular game seemed to have gone completely different from expectations. I for one was surprised at how limited the fallen leaders had been. The previous battle had seen 4 or 5 such casualties, this game only 1. Increasing the casualties done during melee seemed to greatly speed up game play and make combats more decisive.

Artillery in this game was typically sporadic on how it performed. French artillery did quite poorly given how many batteries were present. 10 batteries should have been plenty but several were damaged or silenced for portions of the game. The terrain was a contributing factor to the artillery being limited in value. The secondary reason was the proximity of the forces in limiting what could actually be a target when it wasn't blocked.

Overall, a very fun game that didn't take long to play and would have resulted in a complete reversal of Wellington's offensive plans in Spain. It is likely without any cavalry to speak of left intact, a speedy withdraw into Portugal would be in order.

Losses_______Allies__________French
Infantry_____53______________27
Cavalry______14_______________2
Artillery_____1 captured______1 captured & 3 damaged
Leaders_______1 wounded_______-

Given these disparities in casualties, it didn't seem realistic to continue the game. The plan of Wellington was a carefully timed, methodical attack and ultimately when Packenham's Division along with the cavalry failed to break Thomieres and Curto, then the support gained from turning the flank went out the window. Adding the fact Packenham's Division was shattered and the cavalry effectively obliterated in a surprising failure, the planned offensive was no longer practical.