Map with legend and initial deployment.

This fictitious scenario is dealing with Ney's VI Corps fighting Castanos in 1810, prior to the Bussaco campaign. The actual units here are varied (I do like some variety of foreign units like Nassau and Tirrailleur Corses) but the overall size and commanders are correct. The Spanish forces varied so wildly that who knows what they may have under someone's command at any given time. The Spanish force is just fiction, as is the location of the villages and monastery.
Again, rules for close combat have been modified to double casualty results to speed up game play. The rules are a modified version of
Fire & Fury/Age of Eagles. Commanders within 3" of a unit are affected by the fallen commander rule, rather than only attached commanders. I find this rule provides actual commander casualties and spices up the game.
The stream is low and can be crossed anywhere by infantry or cavalry, but only by bridge for wheeled vehicles. The Spanish control the four objectives at the beginning of the game and have the initiative. The redoubt is worth 5pts., the village of Arlaban is worth 5pts., the farm is worth 5pts. and Monasterio de Monte Ximena is worth 10pts. French break point is when any two commands are completely routed or destroyed. Spanish break point is when any four commands are completely routed or destroyed.
Turn 1 Spanish

Spanish batteries on ridge overlooking Celorico begin to open fire on the leading regiment in Maucune's brigade. The only results was the loss of a stand and disorder. The remaining forces are too far to reach. Not knowing what the French intent fully was, the Spanish remain in place.
French Turn 1
Avant!

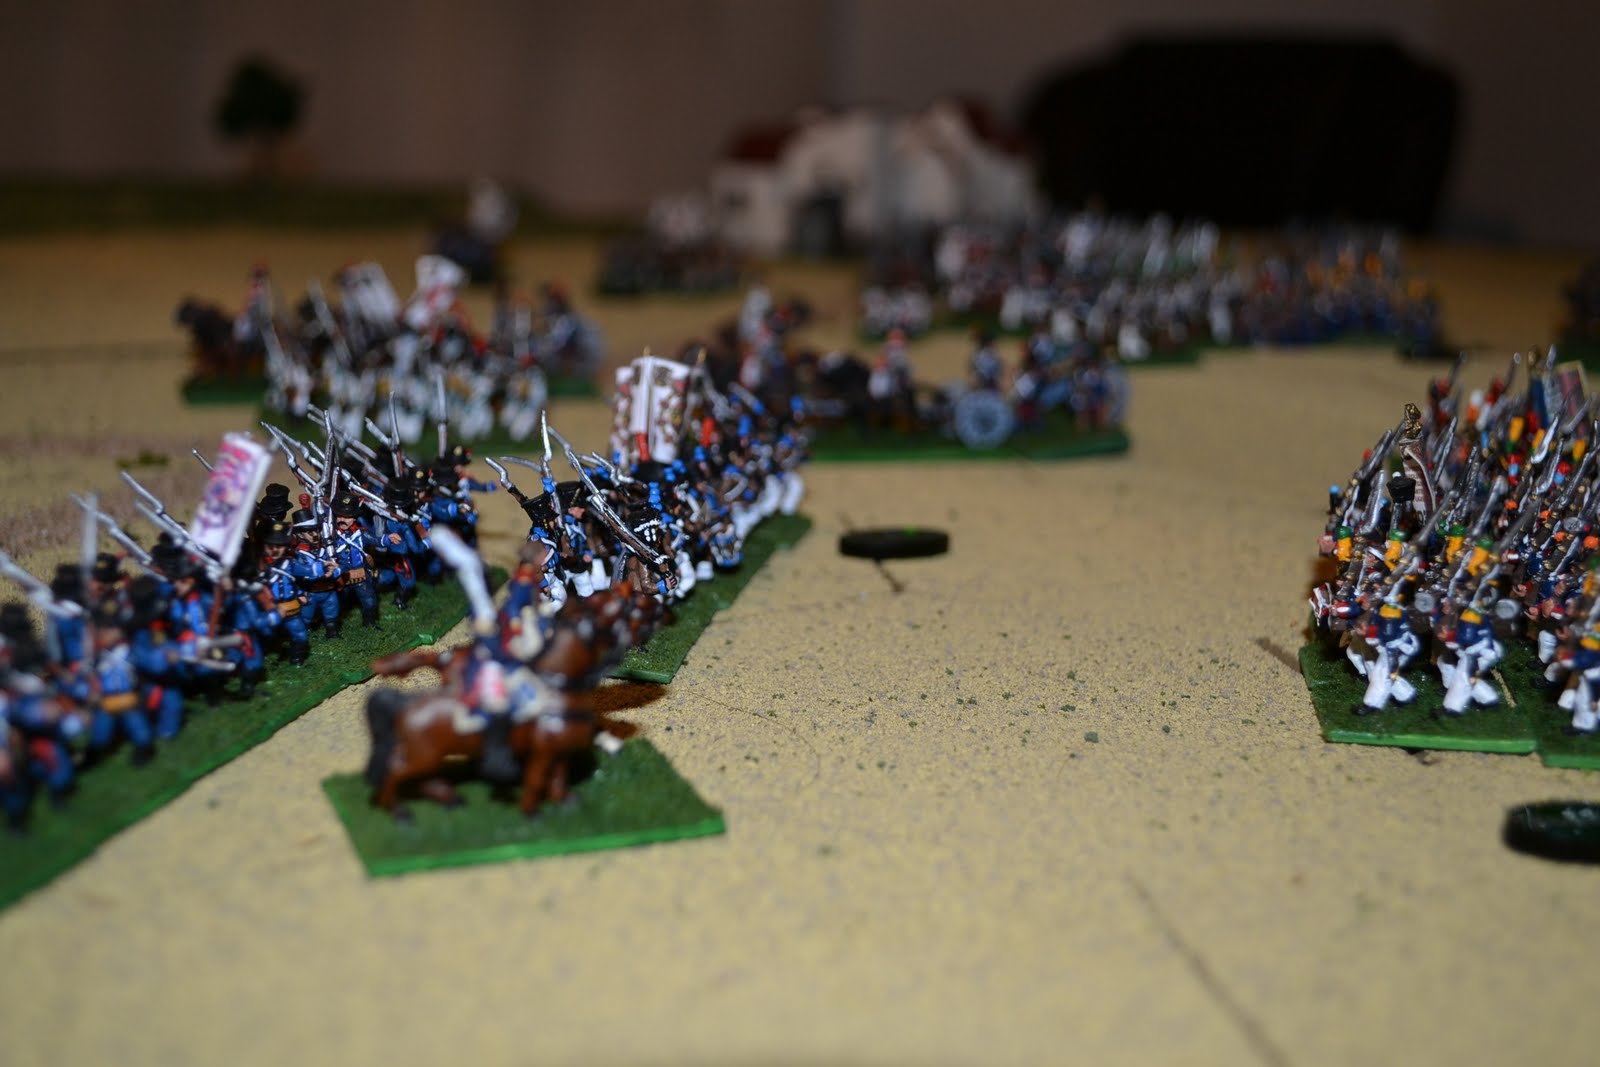
Marchand's 1er Division of Ney's VI Corps on the French left attempt to cross the stream. Loison's 3eme Division on the right do the same.

Skirmish fire took place from Macognet's leading regiment against Pacheco's leading regiment, but was fruitless.
Spanish Turn 2

Pacheco's brigade went on the offensive rather than give the French time to deploy and prepare. With the numbers here relatively even, there was a chance to cause a big delay.
Without the Spanish having an advantage in numbers against the rest of the French advance, they hold ground hoping to buy time and see what casualties may happen.

The Spanish battery in the right of the redoubt combined with the leading infantry unit, manage to inflict a loss of a stand in the fire fight. The French manage to do the same. The combat pushes the Spanish back without any further loss.
French Turn 2

After advancing, Macognet's brigade contact Pacheco's men again. Macognet's column only manages to push Pacheco's men back with no loss to either side.

Maucune's brigade along with Ferrey's brigade of Loison's 3eme Division make contact with Juntilla's men. The Spanish battery manage to inflict the loss of a stand on the supporting regiment in Maucune's brigade. The rest of the battle line caused plenty of disorder with Ferrey's men inflicting the loss of two stands in Juntilla's left regiment during shooting.

The combat causes two more stands to be lost and the regiment is thrown back beyond musketry range. Juntilla's right regiment suffers the same fate.

The French breakthrough, but because of wet shoes and socks, cannot catch the barefoot Spaniards!
Merde!
Spanish Turn 3

Juntilla's left regiment did not rally and lost an additional stand during its flight. Juntilla's right regiment does rally and San Marco brings up a regiment to fill the gap while the other takes up position on the ridge. Magana's hussars advance to apply some pressure to Ferrey's right.

The Spanish artillery wisely decided they didn't want to be captured, so limbered and fell back. Pacheco's men rallied and reformed into extended line to use fire power to check Macognet's advance.
French Turn 3

The rear regiment of Macognet's brigade made contact with Pacheco's leading regiment.

Maucune's men hit San Marco's men on the ridge. Ferrey's men hit Juntilla's regiment that was covering the retreat of his other regiment.

Part of Ferrey's men approached Magana's hussars. Juntilla's men suffered the loss of a stand during musketry and then were pushed back without any further loss.

San Marco's men on the ridge were routed by Maucune's brigade and the breakthrough took them into the limbered Spanish battery. The determined gunners rolled a 12 to the modified French roll of 13 and managed to slip away unharmed.
Macognet's attacking regiment fought a desperate struggle with Pacheco's Spanish, resulting both sides losing two stands before Pacheco fell back.

Lamotte's light cavalry brigade reach the stream.
Spanish Turn 4

Both Spanish artillery batteries fall back to avoid being prey. Pacheco's men rally and hold ground. Sanchez's guerrillas advance to hold the line in the presence of Lamotte's cavalry.

Magana's guerrillas advance through the hussars to engage the French infantry. The guerrillas became disordered, but nothing else transpired here at the moment.

San Marco's right regiment fails to rally, but the left advances to hit Ferrey's light regiment. The light regiment lost a stand in the firing phase. During combat, the desperate struggle roll caused two lost stands for both sides before the French broke and lost an additional two stands. San Marco's men broke through to hit Maucune's rear regiment of light infantry. The tide turned and the Spanish were brushed aside and pushed back beyond musketry range.
French Turn 4

Pacheco's lead regiment suffered a loss during the fire fight and two more in combat and then broke and retreated beyond musketry range.

The French breakthrough attack permitted Macognet's left regiment to charge into Pacheco's second regiment positioned behind the former. This regiment seemingly as unfortunate as the former lead regiment, rolled snake eyes, lost half its strength and routed along with their comrades. Maucune's lead regiment takes a loss of a stand during shooting, but continues advancing with artillery deploying on the ridge behind.
San Marco's men were hit by Macognet's right regiment. Their combat was equally disappointing where they lost significantly and were routed as well. (what's left of them is on the far left near the artillery battery)

Ferrey's light infantry rally and move at an oblique to allow Simon's Tirrailleur Corses to advance to engage Juntilla's forward regiment. Ferrey's right regiment engaged Magana's guerrillas.

Simon's men were bounced back without loss by the decimated lead regiment under Juntilla. Ferrey's right regiment rolled a modified 13 while Magana's guerrillas rolled an undignified 2! This shattered the regiment, leaving it with two stands and Magana was grievously wounded in the process. The remnants were pushed back along with the supporting hussars.

Mermet's Division begins to enter.
Spanish Turn 5

Magana's guerrillas manage to rally and move into Arlaban village to occupy it. Magana's hussars decide to take a chance on Ferrey's right regiment which wasn't supported and was also disordered. The only French defensive fire came from here and was ineffective. The hussars are pushed back without any loss but were disordered.

The Spanish batteries unlimber, one having to move and so won't be able to fire. Juntilla's men, like San Marcos, rally but only hold ground.

Sanchez's guerrilla cavalry fall back to try and avoid combat with Lamotte's larger cavalry force. Pacheco's former lead regiment failed to meet the minimal morale requirement and quit the field. Pacheco's other regiment failed to rally, but did not continue to run and held its ground.

Long awaited Spanish reinforcements under de Luna arrive.
French Turn 5

Lamotte's cavalry wastes no time in hitting Sanchez's guerrilla cavalry.

Macognet's left regiment goes after the remnant of Pacheco's regiment and Macognet's right regiment joins Maucune's men in attacking the Spanish artillery batteries.

Ferrey's men attack Magana's hussars and San Marco's only intact regiment. Simon's Tirrailleur Corses attack the remains of Juntilla's lead regiment.

Lamotte's hussars break Sanchez's guerrilla cavalry from the hussars under Lamotte and a breakthrough with infantry under Macognet. The desperate struggle cause two lost stands for the guerrillas and split among the French hussars and infantry. The Spanish lose the second round of combat, lose two more stands and falls back beyond musketry range. Lamotte's hussars break through and complete the kill by eliminating two additional stands.

The Spanish artillery managed to escape with only losing one battery, while inflicting a lost stand during the shooting phase.

Magana's hussars suffer a loss of a stand from shooting. In the combat phase, an additional two stands are lost and they retreat beyond musketry range.

Juntilla's leading regiment is wiped out in the fighting and Juntilla himself is shot dead in the saddle.
Spanish Turn 6

Spanish reinforcements under de Luna form a double defensive line with the artillery battery attaching to its flank. De Luna's men manage to inflict the loss of a stand during musketry on Maucune's leading regiment. French defensive fire managaes to disorder Pacheco's and San Marco's men.

Magana's hussars fail to rally but do manage to hold their ground.

The remnants of Juntilla's and San Marco's men rally and fall back toward Monte Ximena.

Lamotte's hussars fail to rally and hold ground in disorder. Macognet's men attempt to engage Pacheco's men and wipe them out. The shooting from Pacheco's men disorders Macognets men, but they proceed in combat to finish off Pacheco's command.

Macognet's right regiment along with Maucune's brigade, attempt to break the center defensive position established by de Luna. Macognet's men receive canister and musketry and lose a stand during the firefight.

Ferrey's men attack Magana's disordered hussars and San Marco's last effective regiment. Simon's Nassau regiment detaches their elite companies to storm Arlaban and eradicate Magana's guerrillas. San Marco's men lose two stands from musketry as does Magana's hussars.

Magana's hussars do poorly in the combat and are routed off the field and Ferrey's right regiment surges forward. Simon's Nassau regiment is successful on their first assault and push the guerrillas out, with no loss to either side.

San Marco's men are pushed back, opening the French advance toward the monastery to be unhindered from this point forward.

De Luna's defensive line is pushed back and the attached artillery limbers and moves back. This proves to be fatal next turn.
Spanish Turn 7

Sanchez's men rally. The cavalry retrograde behind the infantry for protection. Magana's guerrillas do not rally and leave, taking their wounded commander with them.

San Marco's men rally, but are unable to do anything else. Juntilla's leaderless cadre of a command fall back toward the cemetery on Monte Ximena. All defensive and offensive fire was ineffective this turn.
French Turn 7

Macognet's left regiment rallies from disorder and voluntarily falls back since it is now spent. Lamotte's light cavalry charge into Sanchez's guerrilla infantry.

Macognet's right regiment again with Maucune's brigade charge into de Luna's center line. De Luna's men become disordered during the attacking musketry exchange.

Mermet's men all finally make it down the road but are too late and are of no practical use except as a reserve element.

Tirrailleur Corses back by Mermet's now ready Italian line in support, attack San Marco's demoralized men. a previously silenced French battery returns to action on the ridge line.

Lamotte's cavalry did not do as well as expected. Was it the humid late spring day? Weak horses? The fact they hadn't been paid in months? We'll never know, but they failed. The chasseurs lost a stand during the fusillade and the hussars were disordered and thrown back beyond musketry range. The guerrillas weren't going to be beaten away from the hog farm so easily.
To the upper right, de Luna men can be seen falling back and the leading regiment reduced to half strength in yet another bad Spanish combat result. San Marco's leading regiment is wiped out with San Marco himself being shot. The Tirrailleur Corses surge forward toward the vacuous space before them.

Maucune's leading regiment's breakthrough takes it into Sandoval's uncommitted regiment and attached battery.

Although not detrimental, the regiment is pushed back without loss and the artillery escapes and retreats. Generalismo Castanos unfurls his surrender flag and the negotiations for surrender to Marechal Ney begin.
Conclusion
It seemed pointless to play it out since the Spanish had lost Juntilla and San Marco, Magana wounded and Pacheco with nothing to command. The defending grenadiers would have posed a problem, but not having inflicted enough damage on the French first, I'm unconvinced the Spanish would have won or managed to repulse the French assaults. The redoubt was only effective in splitting the attackers, so did serve as a delaying mechanism. The scenario might be replayed in the future with more Spanish to see if any different result could occur. Considering Mermet's division never fired a shot, something short of a Spanish army seen at Ocana might be required to win