For a change of scenery, an old west game called Dead Man's Hand. Designed for 28mm as a skirmish game, it is a little out of the ordinary for me. A member of the group has been working on putting this together and going so far as to hand make all the buildings pictured here. Plenty of law enforcement, cowboys, Indians, Mexicans and some French Foreign Legion. For this particular game, we just had some outlaws and law enforcement.
Being in Oklahoma, this land was once part of the frontier where gangs and famous outlaws like Jesse James, Belle Star and others passed through, robbed and even lived in. This game was based on the September 1, 1893 Dalton Gang shootout in Ingalls, Oklahoma. The buildings pictured here are more numerous than what's standing there now, but we decided to use all of what was available. All the actual gang members were represented as well as the law enforcement posse sent to bring these men to justice.
I had control of all the outlaws. Did my men drink too much in the saloon? Were they just horrible shots? Unlike the real shootout https://en.wikipedia.org/wiki/Ingalls,_Oklahoma my men couldn't seem to hit anyone.
Just as the real shootout had started, my men were also inside the buildings awaiting the arrival of law enforcement that they knew were coming for them. I anticipated my seven men could take on anything. If worse came to worse, we had horses in the barn and could ride out of town. In fact, to win all I had to do was have half or more of my men escape.
My men quickly found out that most of their pistols were ineffective at shooting the better armed law enforcement across the street. The couple of shotguns I had were also better suited for up close gun fighting. In short, my men were not armed for this style of shootout. Of course, if I were rolling high, that probably would have not been such a problem.
The law enforcement agents came on strong and were quite brave. Repeatedly I opened fire and time and time again I couldn't hit them. They came on closer, even taking cover where possible and still I could do nothing. Running out the back of the buildings and heading to the barn to run away from the town seemed like the only sensible thing to do.
Up on the second floor of the bank was a skilled law enforcement agent with some long rifle. He seemed to be able to find his mark (nearly killing my leader twice) and I tried not expose my men to anything he could shoot.
The horse in the picture represents one member of the gang mounted up and riding out. No appropriately mounted figures were painted yet, but that will be taken care of in due time. The barn is on the left and my men are quickly sneaking in the back door to jump on their horses and rush out under a hail of gun fire springing from buildings.
A view from the law enforcement's side. Not pictured was a small shootout behind the buildings in the background where even at point blank range, I still couldn't manage to hit anyone out in the open. I did manage to successfully outrun the law enforcement agents entering the buildings as I escaped out the back door.
And the game ended with 2 of my men dead and more than half escaped. So I won, though how I managed not to injure any of the law enforcement agents is hard to understand. The Dalton Gang survived this encounter and will need to recruit to build up the ranks. Maybe this time find some new guys that can hit their targets.
The rules play out fine and are easy to pick up. There are cards drawn that look like 1800's playing cards (but smaller). The cards are more for the purposes of initiative rather than dictating certain actions. The cards can also be used to enhance or cancel certain game effects, depending on what is written upon the card. We'll play this game again soon and I believe all the buildings will be painted. I will make sure to get some better pictures for that post.
Modeling and gaming in the Peninsular theatre during the Napoleonic wars.
Translate
Saturday, August 24, 2019
Friday, April 26, 2019
Ottoman Janissary Mehter Band
Last year I purchased this pack of By Fire And Sword Ottoman Janissary Mehter Band for the fun of adding it to the table top. It has no combat value and like many other unique sets I have, it is low on the painting list. Having caught up on some projects, I took a crack at it.
The figures themselves were quite clean and crisp. Very little cleaning up was needed to get these figures ready for priming. The plastic base that comes with the figures is adequate, but wanting all of my figures to maintain a magnetized standard, I opted to ditch that plastic base.
The website has a pretty set painted up and I at first tried to replicate this. One of the figures I received is not shown in that image and so after some research, I finally copied an image of a real Ottoman-Turkish Mehter Band. After reading up on the Ottoman army of this time period, the Sultan was not the only one with such a band. Regional governors were also known to raise such bands for special services. One can easily imagine a variety of costumes were possible in the various parts of the empire as well as transitioning between one governor to the next.
This was my first experience with this brand of figures. They appear to have quite a few figures for those looking for the Siege of Vienna and later. Some of the figures appear to lack enthusiasm on the movement and appear more posed than animated. Such designs are not right or wrong, just a matter of preference. Given the scarcity of figures for such exotic armies, one cannot be too discerning. I look forward to getting this piece on the table for a specific scenario soon.
The figures themselves were quite clean and crisp. Very little cleaning up was needed to get these figures ready for priming. The plastic base that comes with the figures is adequate, but wanting all of my figures to maintain a magnetized standard, I opted to ditch that plastic base.
The website has a pretty set painted up and I at first tried to replicate this. One of the figures I received is not shown in that image and so after some research, I finally copied an image of a real Ottoman-Turkish Mehter Band. After reading up on the Ottoman army of this time period, the Sultan was not the only one with such a band. Regional governors were also known to raise such bands for special services. One can easily imagine a variety of costumes were possible in the various parts of the empire as well as transitioning between one governor to the next.
This was my first experience with this brand of figures. They appear to have quite a few figures for those looking for the Siege of Vienna and later. Some of the figures appear to lack enthusiasm on the movement and appear more posed than animated. Such designs are not right or wrong, just a matter of preference. Given the scarcity of figures for such exotic armies, one cannot be too discerning. I look forward to getting this piece on the table for a specific scenario soon.
Sunday, March 10, 2019
Russo-Ottoman War 1806-1812 Debut Battle
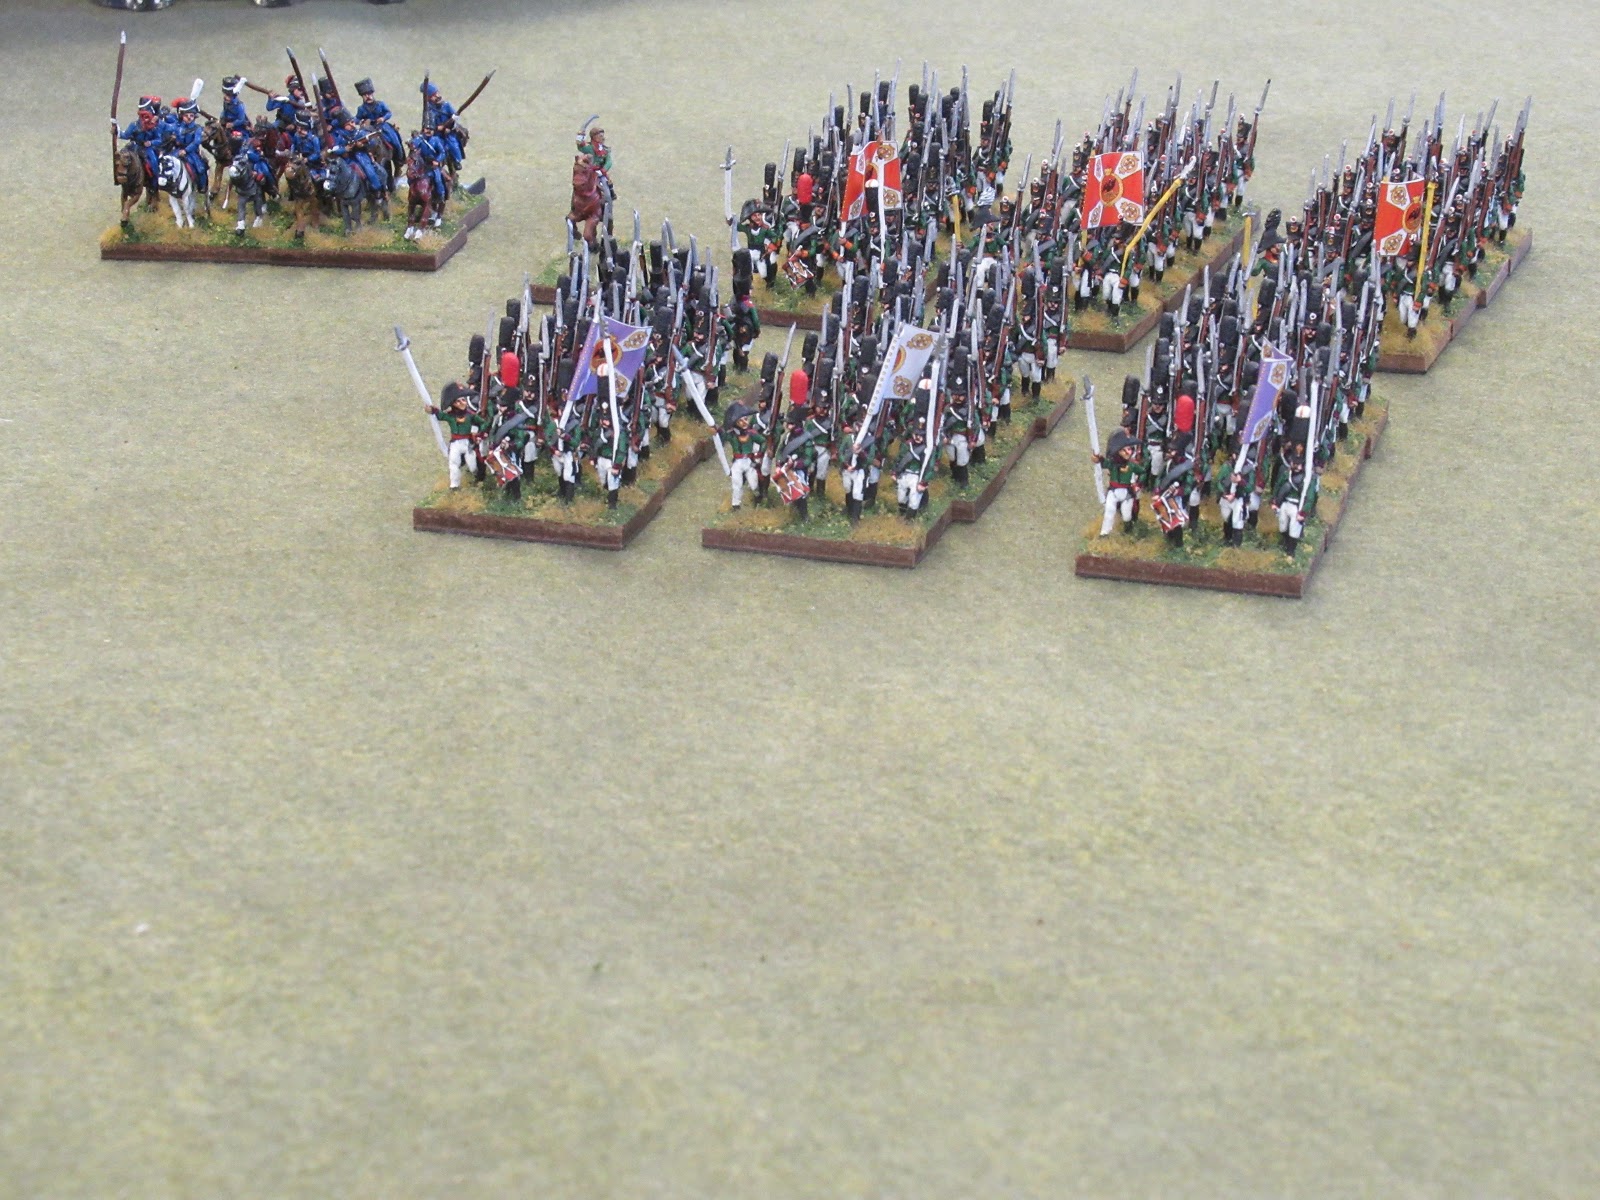
After years of work by myself and another gamer who contributed to the Ottoman painting and the terrain, my Russians and Ottomans are now meeting to begin their war. Here we have the Russian center and right coming quickly onto the field in march column to get at the waiting Ottomans.
The Russian left has the Siberia grenadier regiment and Olonetz musketeer regiment escorting some cossacks. This flank will be making contact first as they show no fear of the Ottoman forces they are facing.
The Ottoman left has a cavalry brigade backing the army's heavy artillery. The battery has a dominating presence that the Russians will feel as early as turn 1.
The Ottoman center is a bit weaker, comprising of militia units and a foot battery with medium guns. The woods are going to be their real defense in slowing the Russian advance as a barrier.
The Ottoman center remains relatively quiet for the first few turns. Only the Ottoman artillery could make itself felt by hitting the fast moving Cossack cavalry who were screening the Russian advance. A few shots found their mark and the Cossacks decided not to move any closer to the guns.
The Russian left continues to march up, unconcerned with deploying for action this far out. Their fast marching didn't give the Ottoman right much time to perfect their ranges of the artillery.
The Russian center is moving a little slower. The foot battery is still limbered and the Russian player is contemplating just exactly how to move between the obstacles and appear right before the waiting Ottoman guns.
The 5th Jagers are attempting to slip around the church and get up and clear the woods. Backing them is the Russian horse artillery battery that is attempting counter-battery fire against the Ottoman heavy battery just opposite it.
Here the Ottoman right waits for the Russians. They considered coming out to meet the Russians head on but were no confident the odds would be in their favor. Those tall black plumes indicated grenadiers were coming.
On the Ottoman left, the squadrons of the Belarus Hussar regiment are looking to clash sabers with the Ottoman sipahis cavalry. Maybe they could not see all the Ottoman cavalry stacked up behind the guns?
The Ottoman cavalry struck first. Preferring to counter the superior quality of the Russian cavalry with numerical advantage, the chance move was to pay off with a victory over the hussars.
One of the Ottoman militia units has now come into musketry range of the lead grenadier battalion. The single disruption caused would prove to be entirely useless for the upcoming turn.
The Russian infantry moving up is a feigning gesture as they cannot initiate contact with the Ottoman cavalry. They are probably hoping the Ottomans will surge forward and smash themselves uselessly against squares. I would not oblige.
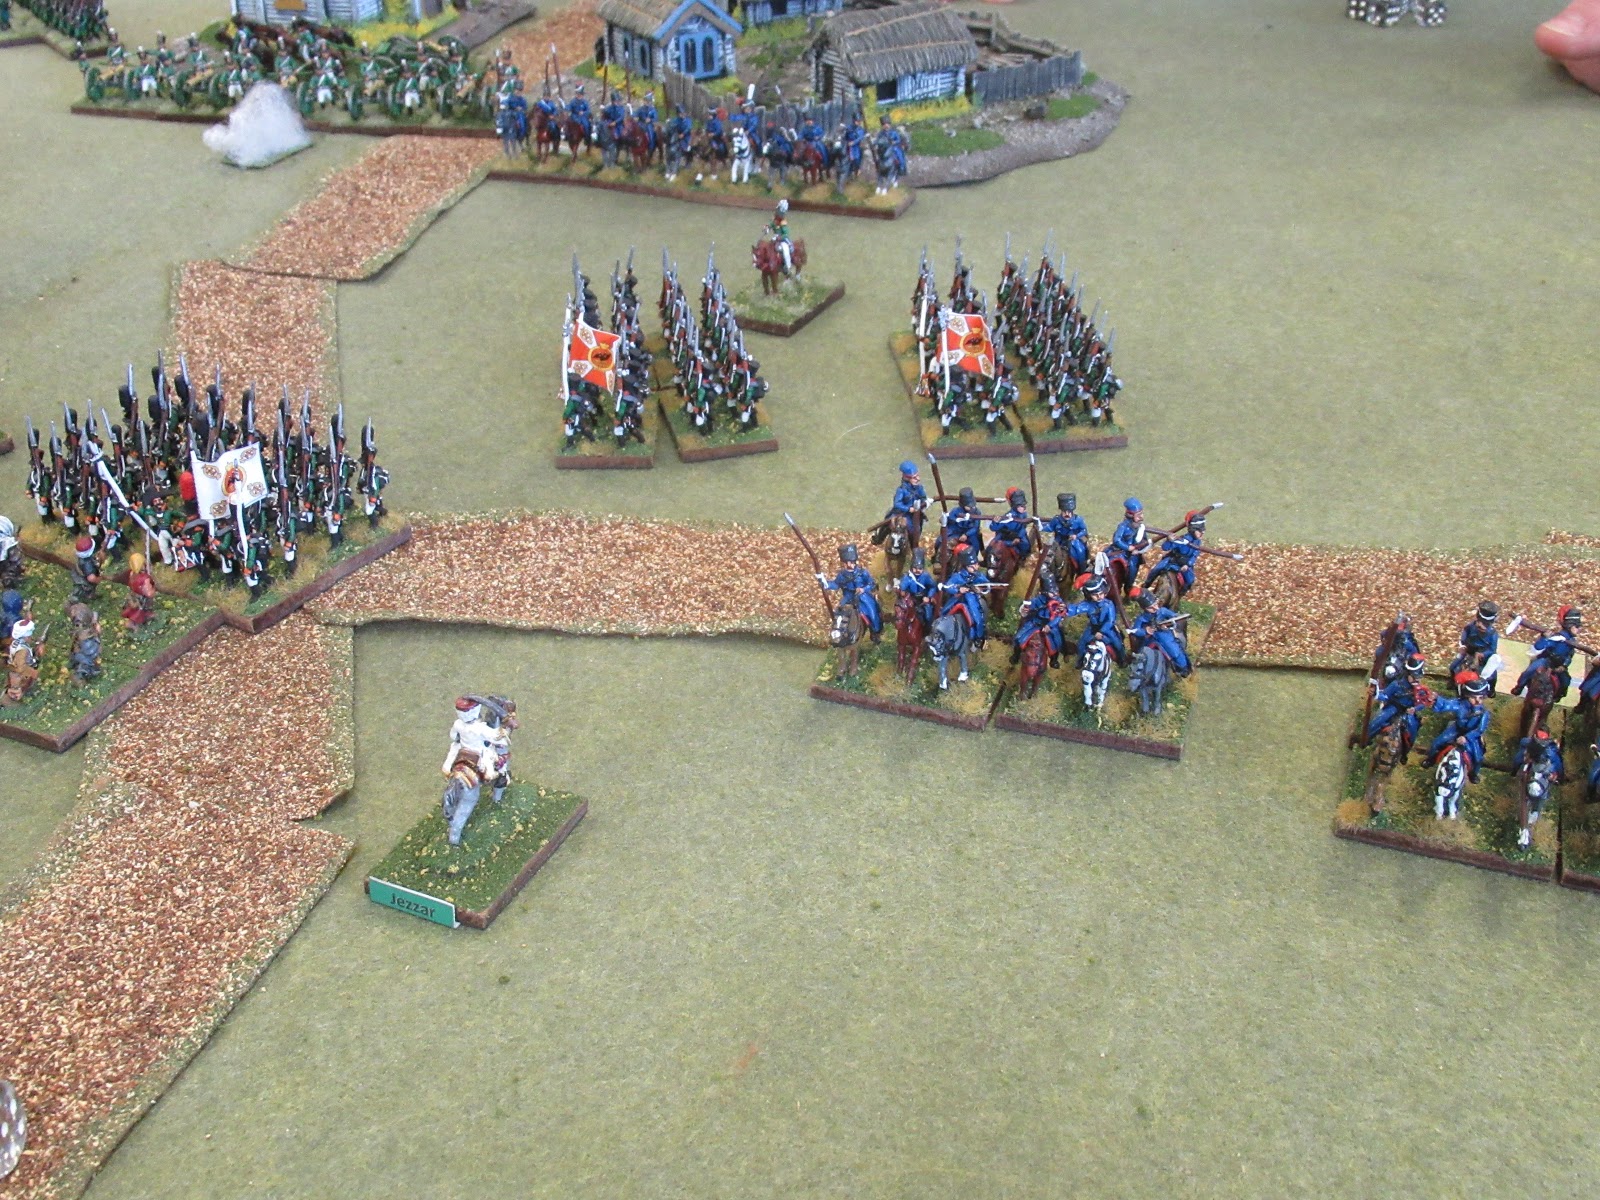
The Russian center is beginning to take hold as the foot battery came up and unlimbered in canister range of the Ottomans. Some Cossacks are positioning themselves for a quick strike at the Ottoman battery before them.
The Russian battery managed to force the Ottoman battery to limber up. As it turns out, the other Ottoman battery experienced the same dilemma and was forced to limber. Limbered guns cannot fire and now the Cossacks are feeling much braver.
And as expected, the Cossacks surge forward. As it turned out in the combat, the Cossack were clumsy and did as poorly as possible with the dice rolls and were thrown back. Lucky me as my guns are saved.
A couple of grenadier battalions charge into the Ottoman militia unit at the upper right. Some other Cossacks are coming up and looking at engaging the Ottoman cavalry.
The Russian grenadiers are now on contact. They will break the front battalion with ease and will advance to complete their break through of the Ottoman right.
The jagers form into line and continue to meander their way forward. Do the woods make them uneasy and so they don't rush in and clear them? Or is it all that Ottoman cavalry that has them concerned?
As mentioned above, the front Ottoman battalion collapsed immediately. This second one is facing the same scenario. The Ottoman infantry is inflicting a few disruptions upon the Russians with musketry, but rolling poorly in combat won't allow them to hold on.
And here is where I made a mistake. After just barely beating off the Cossacks in the previous combat, I somehow forgot to move this battery or unlimber it. Had I just umlimbered it and opened canister fire upon the infantry, it would have slowed the Russian onslaught. My mistake gave the Russian infantry the chance to eventually charge into the limbered guns and break it.
The Ottoman cavalry managed to destroy part of the hussars but the rest the remaining squadrons of the Belarus Hussars attacked and were repulsed from their charge. The Ottoman heavy battery is back in action once again.
My neglect allowed my battery to be hit by some Russian infantry. The Cossacks decide to be aggressive and go after the Ottoman cavalry.
So as it turned out, the jagers were perhaps concerned about the bulk of Ottoman cavalry waiting for them. The jagers successfully formed square and managed to throw back the first charge.
The hussars and Ottoman cavalry decide to go at it again. All the Ottoman cavalry here makes any victory by the hussars useless due to the numerical odds.
The overall view of the tactical situation. I am surprised the Russian players both opted to ignore the villages and not waste troops holding places that had no value to winning the scenario. Most players cannot avoid these black holes that suck up manpower that could be used elsewhere.
The extreme end of the Ottoman right is practically gone and now some Russian musketeers are attempting to engage and finish off the flank. An Ottoman cavalry unit eyes a chance to hit some surprised Russian troops.
The Cossack's luck was in play as they both managed to win decisively and break the Ottoman cavalry they charged. Just out of the camera's lens are two more Ottoman cavalry units they will now have to face off against.
The Russian foot artillery continues to blast away, unopposed. The Ottoman infantry partially in the woods is getting sprinkled with long range canister fire.
And here we say goodbye to what's pretending to be the Ottoman center. As it would turn out, the grenadiers held a near perfect success anytime they made contact. The Lasalle Rules for a Valiant rated unit against a Shaky unit is significant. On top of poor dice rolling, the grenadiers have the punch to break through about anything.
The Ottoman right has routed and now the Russians begin their wheel toward the center to wrap it up and call it a day.
Two Ottoman cavalry units remain but since their command has broken, they will flee the field and deprive the Cossacks of another taste of combat.
The jagers had pushed off the first Ottoman cavalry charge while in square and thought that they would have no more trouble. As soon as they changed back into line, the cavalry took advantage of the situation and hoped to obtain an easy victory.
And here we see a parting shot of the batteries attempting to duel it out. Some Ottoman cavalry attempted to snake around the village to hope for a dash at the Russian guns but the battle is lost. The Russians chose to get into close combat and not exchange fire with the Ottomans and it worked out well.
The Russian left has the Siberia grenadier regiment and Olonetz musketeer regiment escorting some cossacks. This flank will be making contact first as they show no fear of the Ottoman forces they are facing.
The Ottoman left has a cavalry brigade backing the army's heavy artillery. The battery has a dominating presence that the Russians will feel as early as turn 1.
The Ottoman center is a bit weaker, comprising of militia units and a foot battery with medium guns. The woods are going to be their real defense in slowing the Russian advance as a barrier.
The Ottoman center remains relatively quiet for the first few turns. Only the Ottoman artillery could make itself felt by hitting the fast moving Cossack cavalry who were screening the Russian advance. A few shots found their mark and the Cossacks decided not to move any closer to the guns.
The Russian left continues to march up, unconcerned with deploying for action this far out. Their fast marching didn't give the Ottoman right much time to perfect their ranges of the artillery.
The Russian center is moving a little slower. The foot battery is still limbered and the Russian player is contemplating just exactly how to move between the obstacles and appear right before the waiting Ottoman guns.
The 5th Jagers are attempting to slip around the church and get up and clear the woods. Backing them is the Russian horse artillery battery that is attempting counter-battery fire against the Ottoman heavy battery just opposite it.
Here the Ottoman right waits for the Russians. They considered coming out to meet the Russians head on but were no confident the odds would be in their favor. Those tall black plumes indicated grenadiers were coming.
On the Ottoman left, the squadrons of the Belarus Hussar regiment are looking to clash sabers with the Ottoman sipahis cavalry. Maybe they could not see all the Ottoman cavalry stacked up behind the guns?
The Ottoman cavalry struck first. Preferring to counter the superior quality of the Russian cavalry with numerical advantage, the chance move was to pay off with a victory over the hussars.
One of the Ottoman militia units has now come into musketry range of the lead grenadier battalion. The single disruption caused would prove to be entirely useless for the upcoming turn.
The Russian infantry moving up is a feigning gesture as they cannot initiate contact with the Ottoman cavalry. They are probably hoping the Ottomans will surge forward and smash themselves uselessly against squares. I would not oblige.
The Russian center is beginning to take hold as the foot battery came up and unlimbered in canister range of the Ottomans. Some Cossacks are positioning themselves for a quick strike at the Ottoman battery before them.
The Russian battery managed to force the Ottoman battery to limber up. As it turns out, the other Ottoman battery experienced the same dilemma and was forced to limber. Limbered guns cannot fire and now the Cossacks are feeling much braver.
And as expected, the Cossacks surge forward. As it turned out in the combat, the Cossack were clumsy and did as poorly as possible with the dice rolls and were thrown back. Lucky me as my guns are saved.
A couple of grenadier battalions charge into the Ottoman militia unit at the upper right. Some other Cossacks are coming up and looking at engaging the Ottoman cavalry.
The Russian grenadiers are now on contact. They will break the front battalion with ease and will advance to complete their break through of the Ottoman right.
The jagers form into line and continue to meander their way forward. Do the woods make them uneasy and so they don't rush in and clear them? Or is it all that Ottoman cavalry that has them concerned?
As mentioned above, the front Ottoman battalion collapsed immediately. This second one is facing the same scenario. The Ottoman infantry is inflicting a few disruptions upon the Russians with musketry, but rolling poorly in combat won't allow them to hold on.
And here is where I made a mistake. After just barely beating off the Cossacks in the previous combat, I somehow forgot to move this battery or unlimber it. Had I just umlimbered it and opened canister fire upon the infantry, it would have slowed the Russian onslaught. My mistake gave the Russian infantry the chance to eventually charge into the limbered guns and break it.
The Ottoman cavalry managed to destroy part of the hussars but the rest the remaining squadrons of the Belarus Hussars attacked and were repulsed from their charge. The Ottoman heavy battery is back in action once again.
My neglect allowed my battery to be hit by some Russian infantry. The Cossacks decide to be aggressive and go after the Ottoman cavalry.
So as it turned out, the jagers were perhaps concerned about the bulk of Ottoman cavalry waiting for them. The jagers successfully formed square and managed to throw back the first charge.
The hussars and Ottoman cavalry decide to go at it again. All the Ottoman cavalry here makes any victory by the hussars useless due to the numerical odds.
The overall view of the tactical situation. I am surprised the Russian players both opted to ignore the villages and not waste troops holding places that had no value to winning the scenario. Most players cannot avoid these black holes that suck up manpower that could be used elsewhere.
The extreme end of the Ottoman right is practically gone and now some Russian musketeers are attempting to engage and finish off the flank. An Ottoman cavalry unit eyes a chance to hit some surprised Russian troops.
The Cossack's luck was in play as they both managed to win decisively and break the Ottoman cavalry they charged. Just out of the camera's lens are two more Ottoman cavalry units they will now have to face off against.
The Russian foot artillery continues to blast away, unopposed. The Ottoman infantry partially in the woods is getting sprinkled with long range canister fire.
And here we say goodbye to what's pretending to be the Ottoman center. As it would turn out, the grenadiers held a near perfect success anytime they made contact. The Lasalle Rules for a Valiant rated unit against a Shaky unit is significant. On top of poor dice rolling, the grenadiers have the punch to break through about anything.
The Ottoman right has routed and now the Russians begin their wheel toward the center to wrap it up and call it a day.
Two Ottoman cavalry units remain but since their command has broken, they will flee the field and deprive the Cossacks of another taste of combat.
The jagers had pushed off the first Ottoman cavalry charge while in square and thought that they would have no more trouble. As soon as they changed back into line, the cavalry took advantage of the situation and hoped to obtain an easy victory.
And here we see a parting shot of the batteries attempting to duel it out. Some Ottoman cavalry attempted to snake around the village to hope for a dash at the Russian guns but the battle is lost. The Russians chose to get into close combat and not exchange fire with the Ottomans and it worked out well.
Saturday, March 2, 2019
Napoleoonic Headquarter Vignettes
For a few years I've been acquiring some unique camp figures for a future vignette project. The Old Glory figures were first in my little collection. For Napoleon's headquarters, the primary figures are Fantassin. Oddly enough in the set, no dismounted chasseurs were included. The Old Glory set I already had did have a few such figures and they were added to flush out the numbers.
Most gamers have a Napoleon on horse figure but having a figure on foot in a headquarters scene is different. Fantassin made multiple Napoleons but I felt this set was the nicest.
The blending of the Old Glory and Fantassin set goes very well together. The Fantassin Berthier at the table isn't wearing his hat. The Old Glory dismounted Imperial Guard Chasseur is holding a hat. A purpose for an otherwise out of place figure.
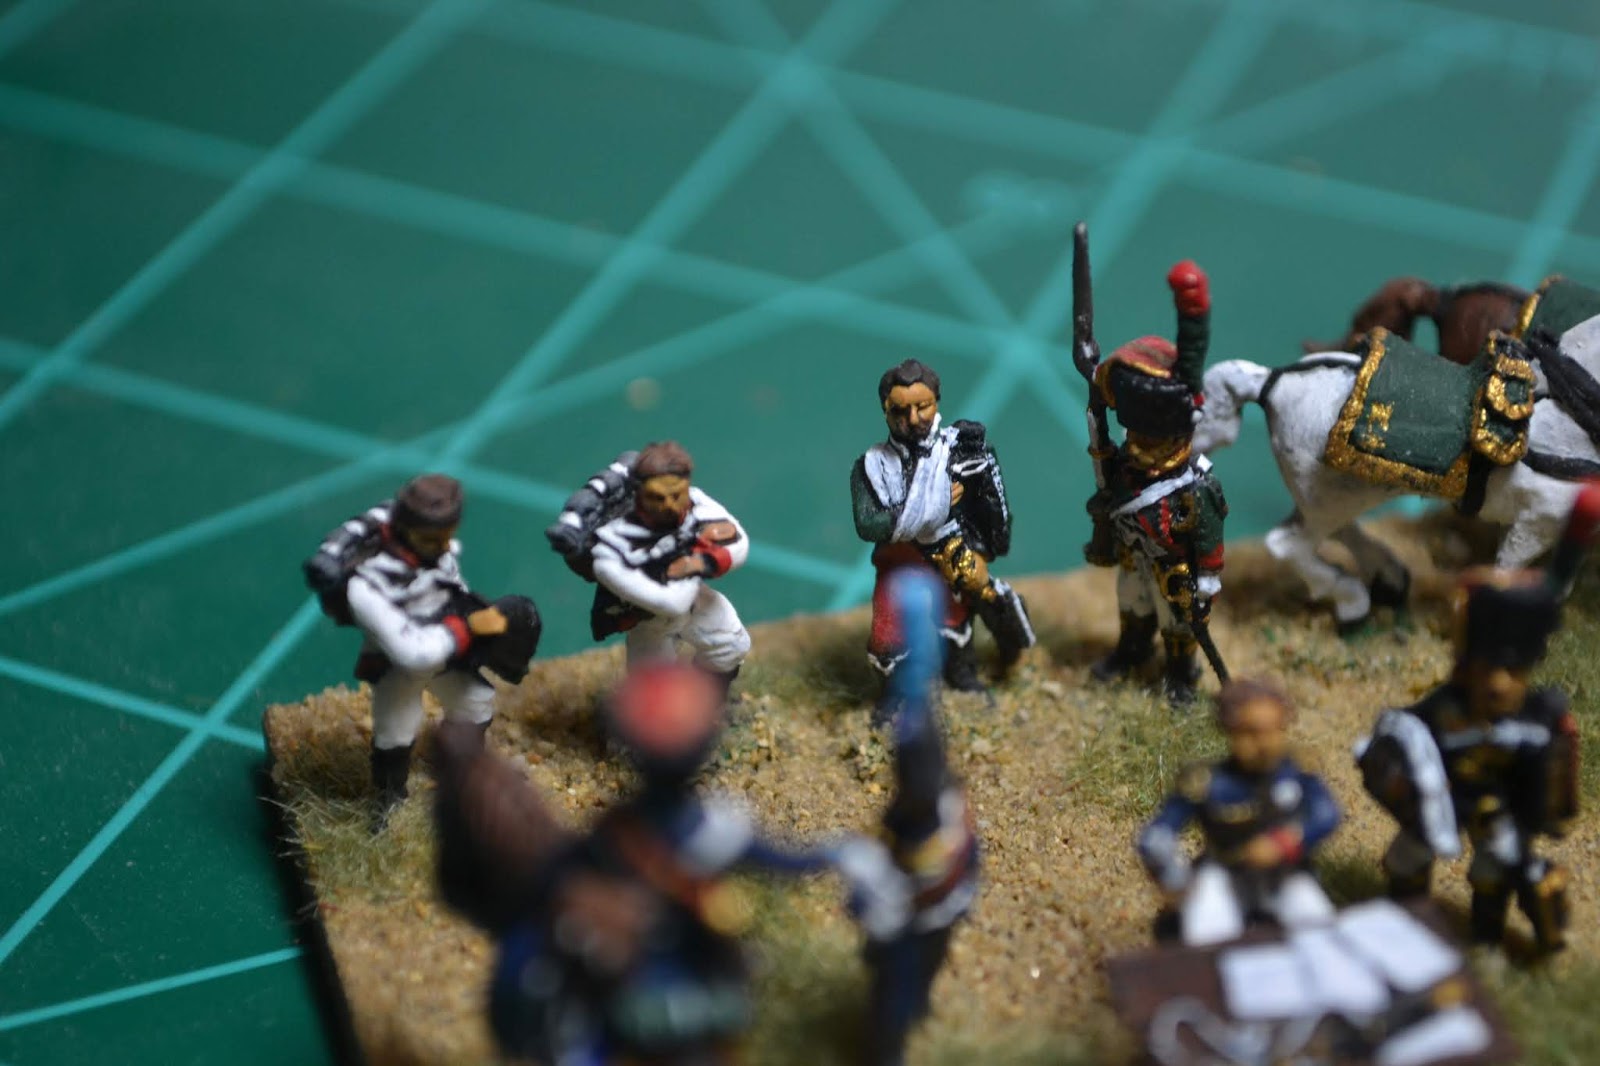
A few Austrian POW's from the Old Glory Trophies set. The hussar officer with his arm in a sling is a unique figure that I also just had to include.
This second vignette is also a combination of figures, this time from Old Glory, Eureka, a couple of Blue Moon figures and one from Fantassin. The pig on the roasting spit is from Baueda and I felt it was a neat little piece to work in.
This Eureka set is unique in that it is a French camp scene yet the sculptor seems to have been a bit confused over what sort of cavalry he was trying to represent. The single breasted surtout and shako seems to give it away as line chasseurs. The problem is that line chasseurs didn't wear heavy cavalry boots, which these figures are wearing. I added a small dog from Hallmark that had just been sitting around with no other use.
The various poses and states of dress were something different to paint. A couple of cantinieres were thrown in to add to the diversity.
And finally, the two figures that inspired me for going through with this project. The seated general with cantiniere on his lap and the female hussar in a well fitted uniform. These Old Glory figures are occasionally talked about on forums and few ever purcahse the set let alone paint them. After years of finding more important figures to paint, I'm happy to say this project is now completed.
Most gamers have a Napoleon on horse figure but having a figure on foot in a headquarters scene is different. Fantassin made multiple Napoleons but I felt this set was the nicest.
The blending of the Old Glory and Fantassin set goes very well together. The Fantassin Berthier at the table isn't wearing his hat. The Old Glory dismounted Imperial Guard Chasseur is holding a hat. A purpose for an otherwise out of place figure.
A few Austrian POW's from the Old Glory Trophies set. The hussar officer with his arm in a sling is a unique figure that I also just had to include.
This second vignette is also a combination of figures, this time from Old Glory, Eureka, a couple of Blue Moon figures and one from Fantassin. The pig on the roasting spit is from Baueda and I felt it was a neat little piece to work in.
This Eureka set is unique in that it is a French camp scene yet the sculptor seems to have been a bit confused over what sort of cavalry he was trying to represent. The single breasted surtout and shako seems to give it away as line chasseurs. The problem is that line chasseurs didn't wear heavy cavalry boots, which these figures are wearing. I added a small dog from Hallmark that had just been sitting around with no other use.
The various poses and states of dress were something different to paint. A couple of cantinieres were thrown in to add to the diversity.
And finally, the two figures that inspired me for going through with this project. The seated general with cantiniere on his lap and the female hussar in a well fitted uniform. These Old Glory figures are occasionally talked about on forums and few ever purcahse the set let alone paint them. After years of finding more important figures to paint, I'm happy to say this project is now completed.
Subscribe to:
Posts (Atom)